
I Remade Zelda Ocarina of Time's Village With AI in 3 Days
 Hugo Caumo8 min read
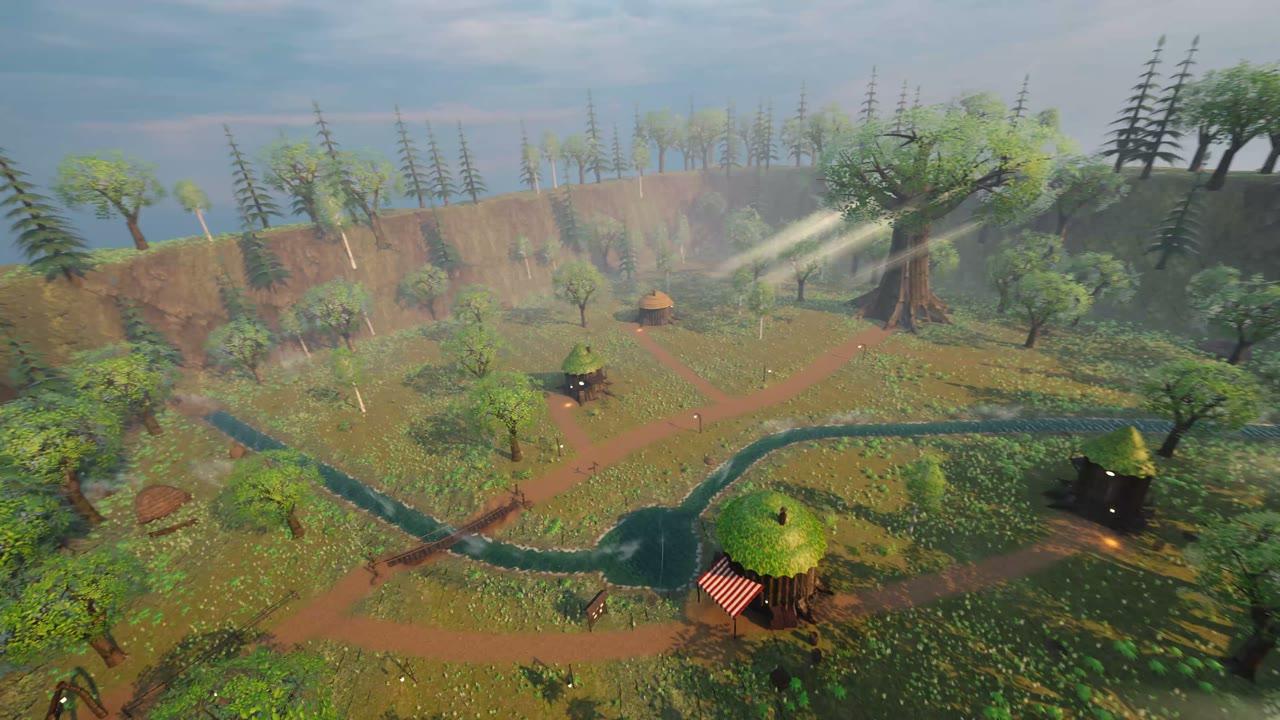
I didn't make these models. 3D-Agent did.
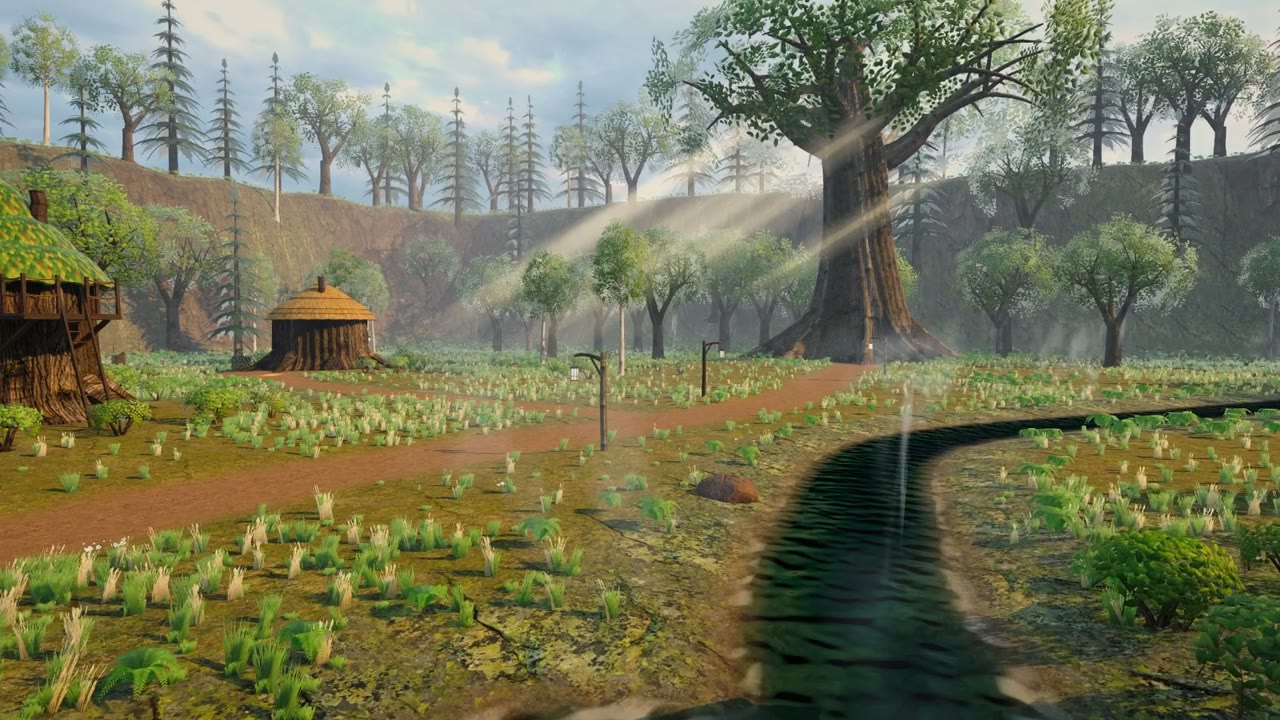
The Ocarina of Time remake came out on November 5. Before it came out, I had one question: could one guy with AI get there first? So I gave myself 3 days to rebuild the first place you see in the game, the forest village, as a place you can really walk around in Unity. 27 prompts. 81 assets. Zero models made by hand.
This post is the written version of my video. It walks through the whole workflow in six steps: the prompt, the four fixes every game model needs, the asset factory, the day everything broke in Unity, the lighting, and the moment my character fell into the ground. You also get the prompts, folded under each step: two real ones from the project, the block I pasted into every prompt, and templates with the words to swap highlighted. Open one to read it or copy it.
3D-Agent vs me: the score
I wasn't making the whole game again. Just the first place you see. And I kept score: every time 3D-Agent solved something by itself, it got a point. Every time I solved something, I got a point.
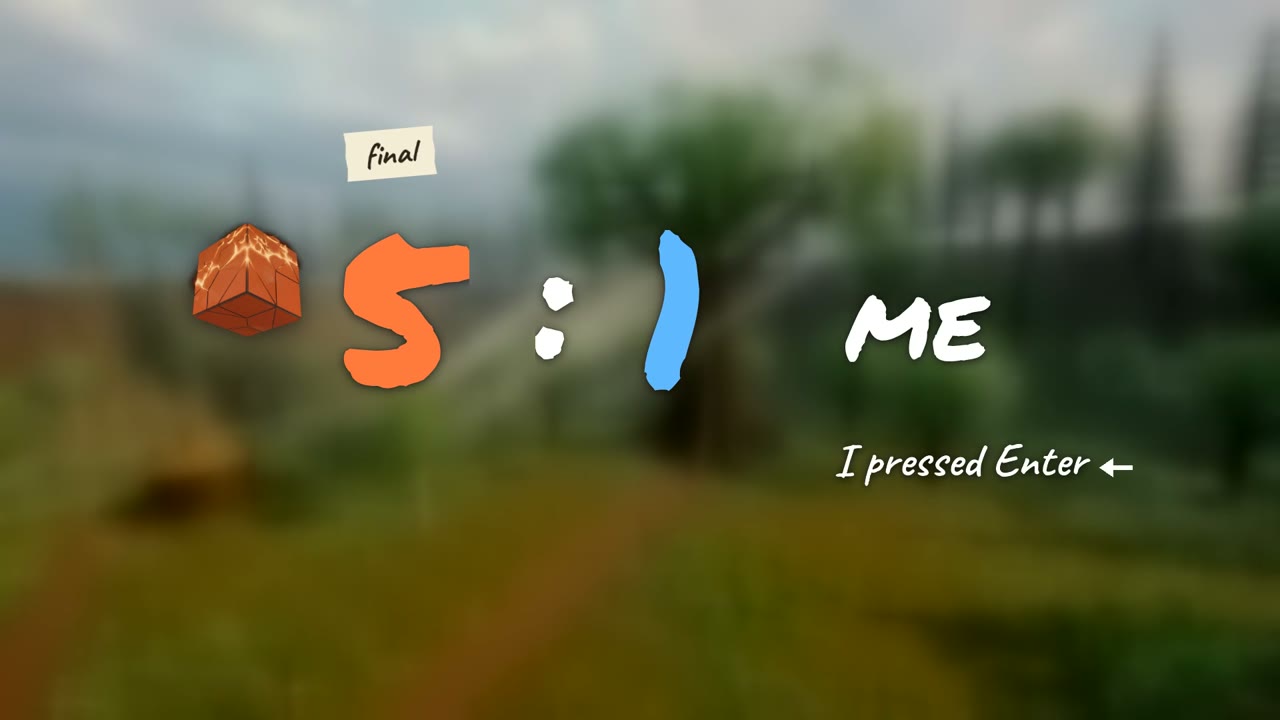
Here's how it ended:
And here's what you get at the end of the workflow. This is real gameplay, not a render:
One thing to be clear about: this is a fan project made for learning. These are new models made from my own prompts, not files from the game. And no, I didn't beat the real remake. It has a big team, voice actors, music producers and a full game. But today, one person can build a place you can walk around in just a few days. A few years ago, it was not even possible.
How to build a game village with AI in 6 steps
- Write the prompt as a spec
Give the AI a style, sizes and a polygon budget.
- Make every model game-ready
Scale, pivot, normals and units.
- Turn the recipe into a factory
Keep the same standards and change only the model.
- Fix the import into Unity
Solve the pink materials and the giant house.
- Build the village and light it
Add the terrain, then one light layer at a time.
- Add colliders and walk
Put a floor under your character and press Play.
Step 1: Write the prompt as a spec
Here's the quick tip nobody tells you. For AI, a prompt is just a spec. It's not a wish.
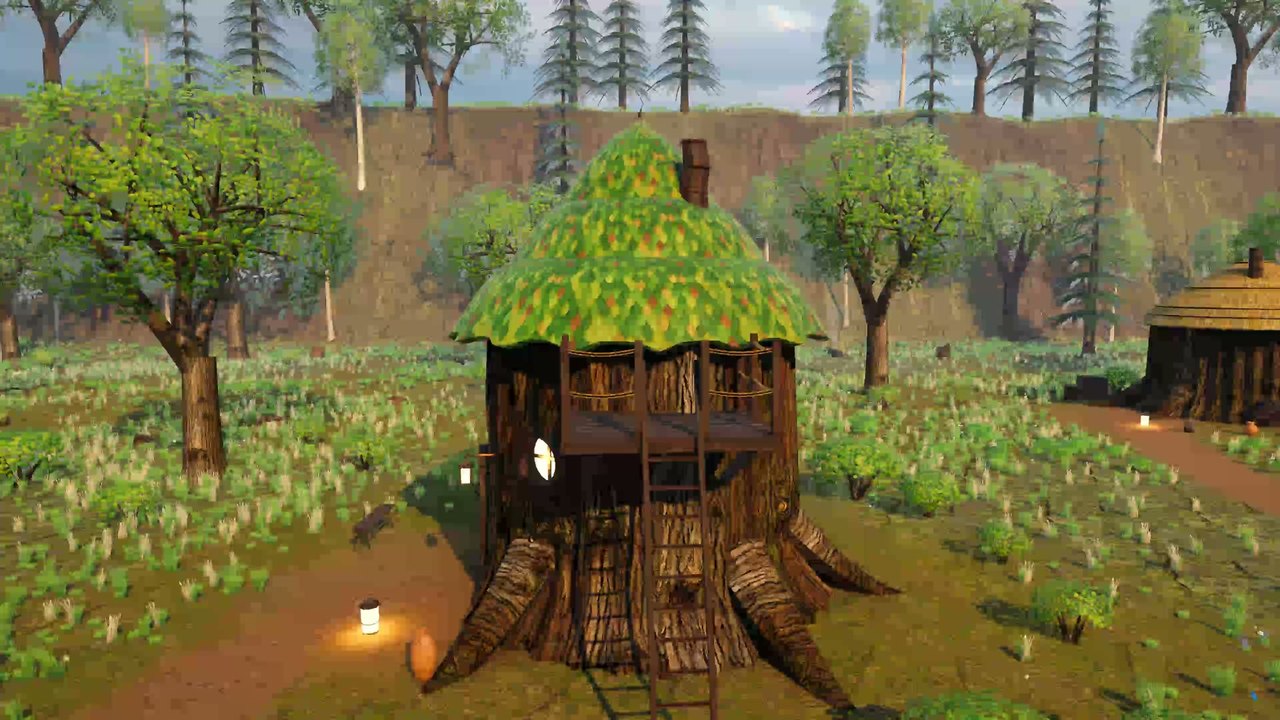
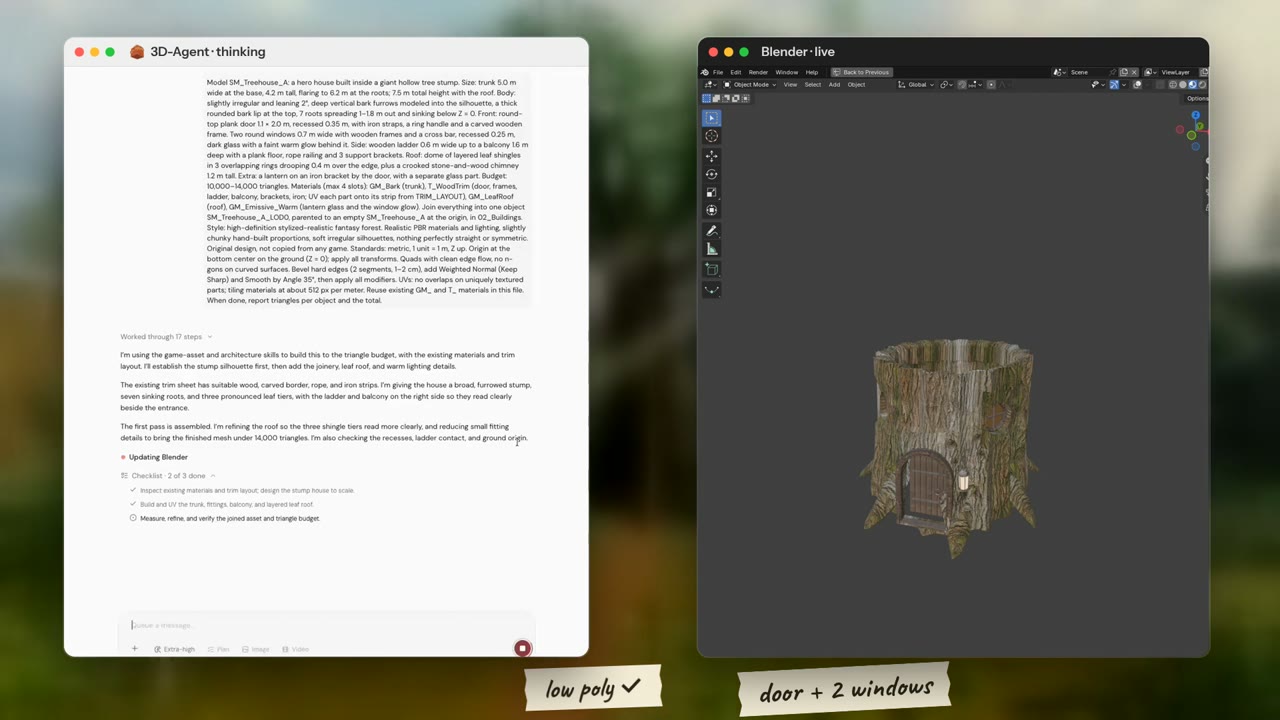
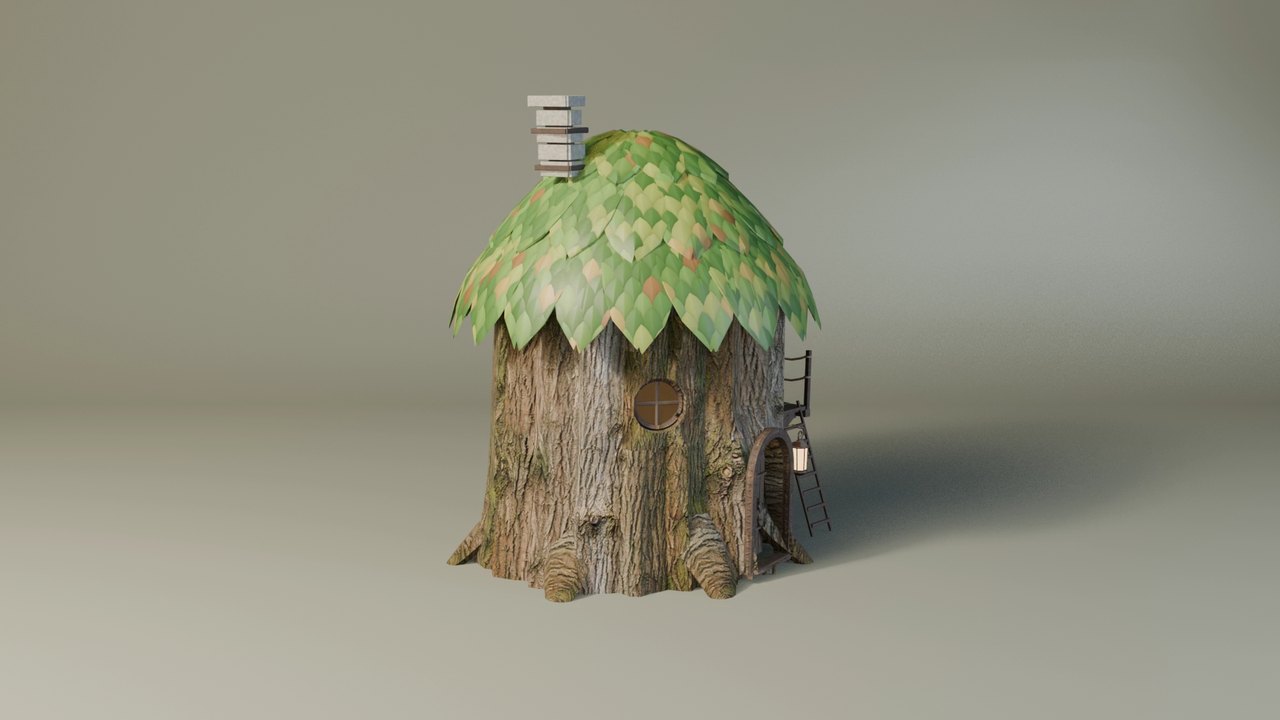
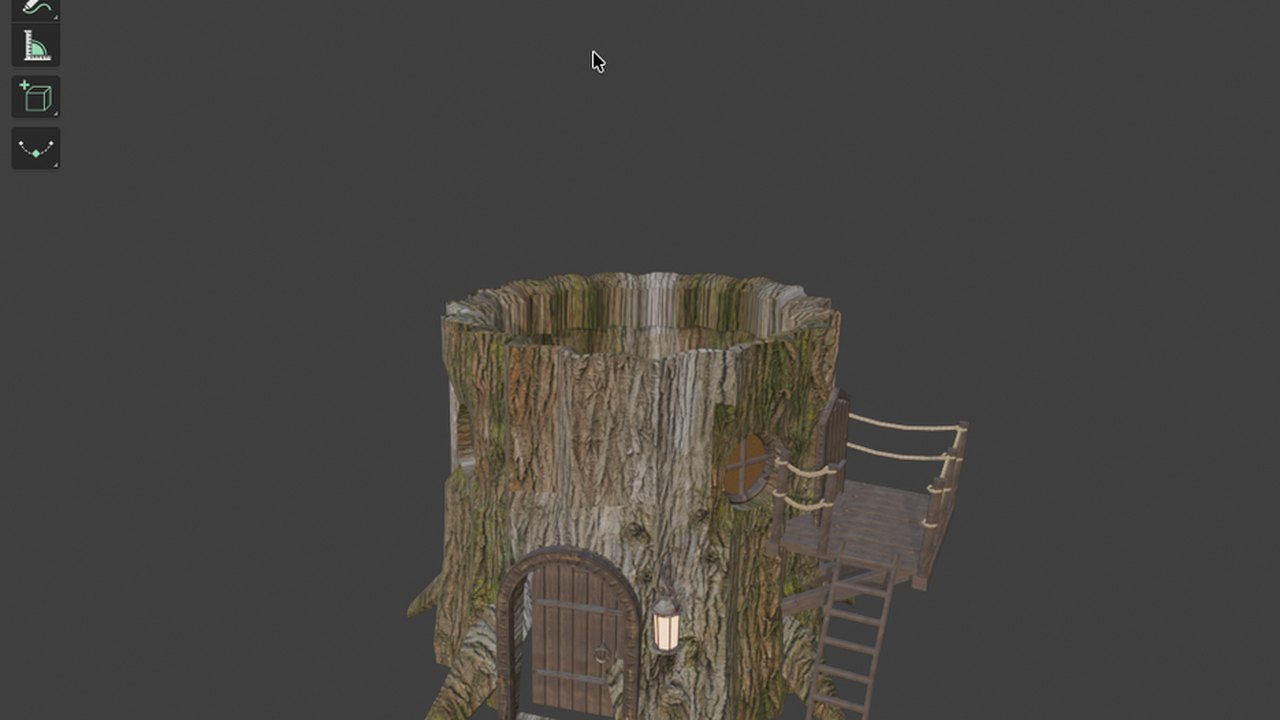
Three things turn a wish into a spec: style, size and polygon budget. I asked for a house inside a giant tree stump, with a round door, a ladder and a leaf roof. It had to be low poly enough for a game.
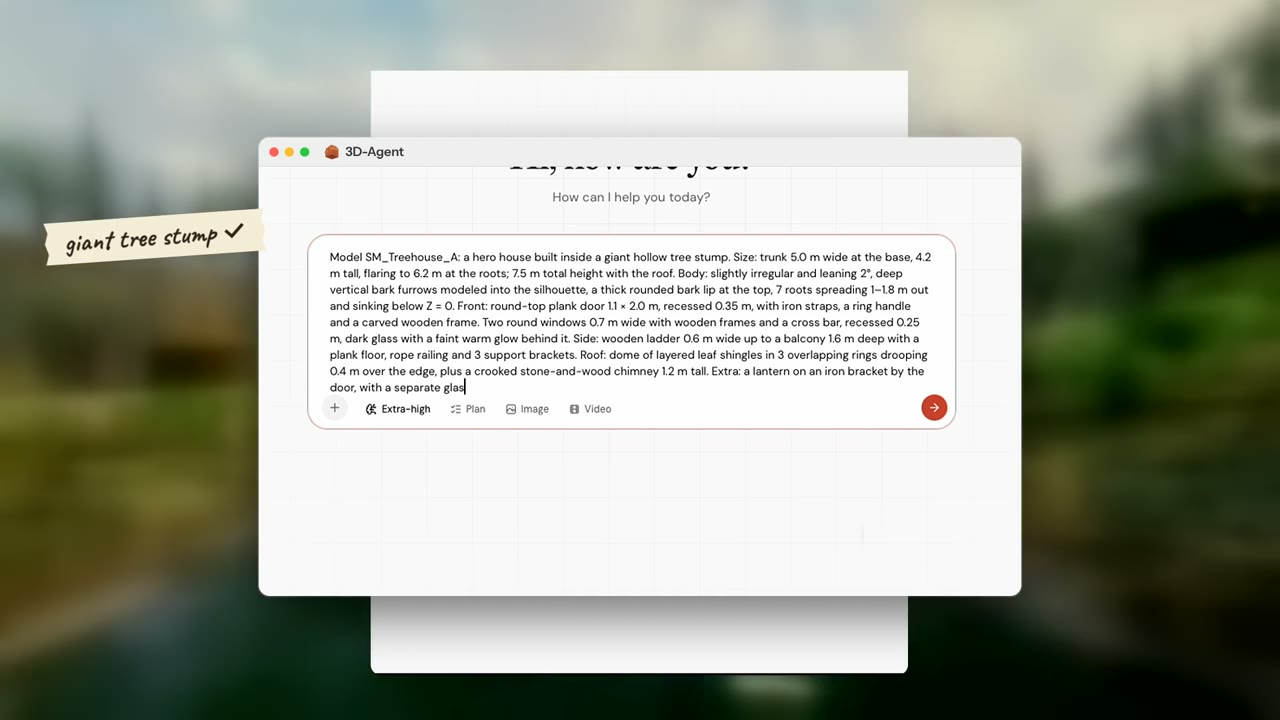
And look, it doesn't just make one big shape. It writes Python code inside Blender and builds the model piece by piece, like a person would.
The treehouse prompt
This is the real prompt from the video. Read how specific it is: real sizes in meters, a triangle budget, material slots, and the file standards. Some names, like TRIM_LAYOUT and the GM_ materials, are from my project's Blender file, so use your own.
Prompt · Treehouse · the real prompt from the video
Model SM_Treehouse_A: a hero house built inside a giant hollow tree stump. Size: trunk 5.0 m wide at the base, 4.2 m tall, flaring to 6.2 m at the roots; 7.5 m total height with the roof. Body: slightly irregular and leaning 2°, deep vertical bark furrows modeled into the silhouette, a thick rounded bark lip at the top, 7 roots spreading 1–1.8 m out and sinking below Z = 0. Front: round-top plank door 1.1 × 2.0 m, recessed 0.35 m, with iron straps, a ring handle and a carved wooden frame. Two round windows 0.7 m wide with wooden frames and a cross bar, recessed 0.25 m, dark glass with a faint warm glow behind it. Side: wooden ladder 0.6 m wide up to a balcony 1.6 m deep with a plank floor, rope railing and 3 support brackets. Roof: dome of layered leaf shingles in 3 overlapping rings drooping 0.4 m over the edge, plus a crooked stone-and-wood chimney 1.2 m tall. Extra: a lantern on an iron bracket by the door, with a separate glass part. Budget: 10,000–14,000 triangles. Materials (max 4 slots): GM_Bark (trunk), T_WoodTrim (door, frames, ladder, balcony, brackets, iron; UV each part onto its strip from TRIM_LAYOUT), GM_LeafRoof (roof), GM_Emissive_Warm (lantern glass and the window glow). Join everything into one object SM_Treehouse_A_LOD0, parented to an empty SM_Treehouse_A at the origin, in 02_Buildings. Style: high-definition stylized-realistic fantasy forest. Realistic PBR materials and lighting, slightly chunky hand-built proportions, soft irregular silhouettes, nothing perfectly straight or symmetric. Original design, not copied from any game. Standards: metric, 1 unit = 1 m, Z up. Origin at the bottom center on the ground (Z = 0); apply all transforms. Quads with clean edge flow, no n-gons on curved surfaces. Bevel hard edges (2 segments, 1–2 cm), add Weighted Normal (Keep Sharp) and Smooth by Angle 35°, then apply all modifiers. UVs: no overlaps on uniquely textured parts; tiling materials at about 512 px per meter. Reuse existing GM_ and T_ materials in this file. When done, report triangles per object and the total.
The end of that prompt is the important part. I pasted the same block at the end of my prompts, so every model comes out in one style, at the same scale, with the same rules. Copy it and change the style to match your game:
Prompt · The block I reuse, from the video
Style: high-definition stylized-realistic fantasy forest. Realistic PBR materials and lighting, slightly chunky hand-built proportions, soft irregular silhouettes, nothing perfectly straight or symmetric. Original design, not copied from any game. Standards: metric, 1 unit = 1 m, Z up. Origin at the bottom center on the ground (Z = 0); apply all transforms. Quads with clean edge flow, no n-gons on curved surfaces. Bevel hard edges (2 segments, 1–2 cm), add Weighted Normal (Keep Sharp) and Smooth by Angle 35°, then apply all modifiers. UVs: no overlaps on uniquely textured parts; tiling materials at about 512 px per meter. Reuse existing GM_ and T_ materials in this file. When done, report triangles per object and the total.
Here's the same structure as a template. Swap the highlighted words for your own model.
Prompt · Game asset (template)
Model SM_MyAsset: what it is, in one line. Size: real sizes in meters. Body: the main shape and how it should feel. Front: the details on the front, with sizes. Side: the details on the side, with sizes. Top: the roof or top, with sizes. Extra: small details. Budget: 10,000–14,000 triangles. Materials (max 4 slots): name each material and what it covers.
Style: your game's art style. Original design, not copied from any game.
Standards: metric, 1 unit = 1 m, Z up. Origin at the bottom center on the ground (Z = 0); apply all transforms. Quads with clean edge flow, no n-gons on curved surfaces. UVs: no overlaps on uniquely textured parts. When done, report triangles per object and the total.
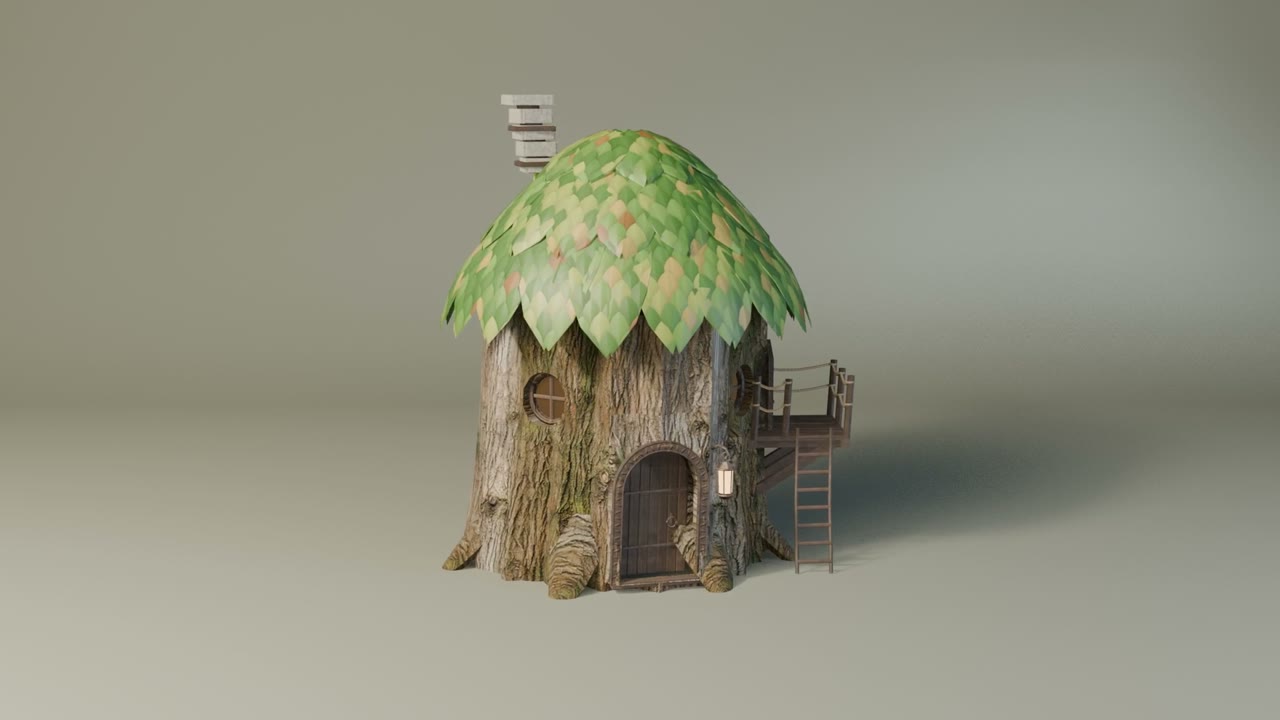
First asset, and it took just one prompt. 3D-Agent 1, me 0.
Step 2: Make every model game-ready
The model is almost ready for a game, but not yet. Every model needs four fixes:
- Apply the scale. Mine read 1.37. It has to read 1.00.
- Put the pivot on the ground. Otherwise the model floats or sinks when you place it.
- Check the normals. Red means the faces are flipped.
- One unit has to be one meter. Then everything in the game has real sizes.
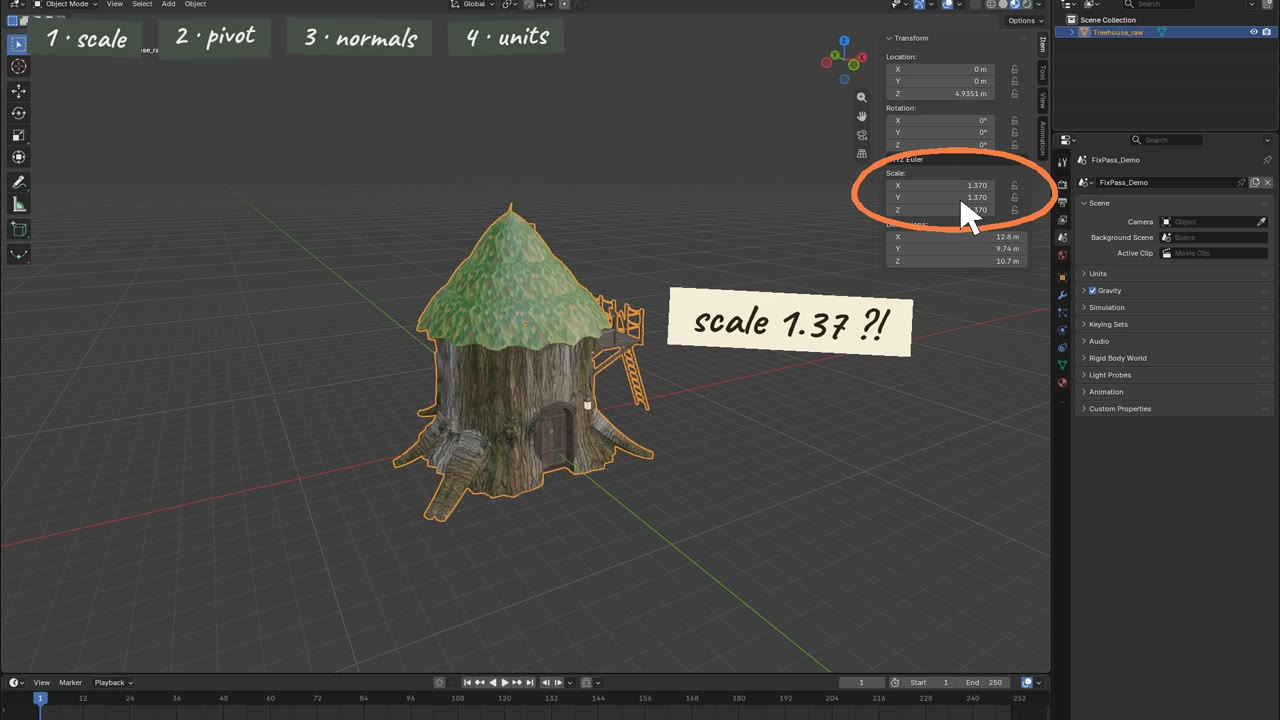
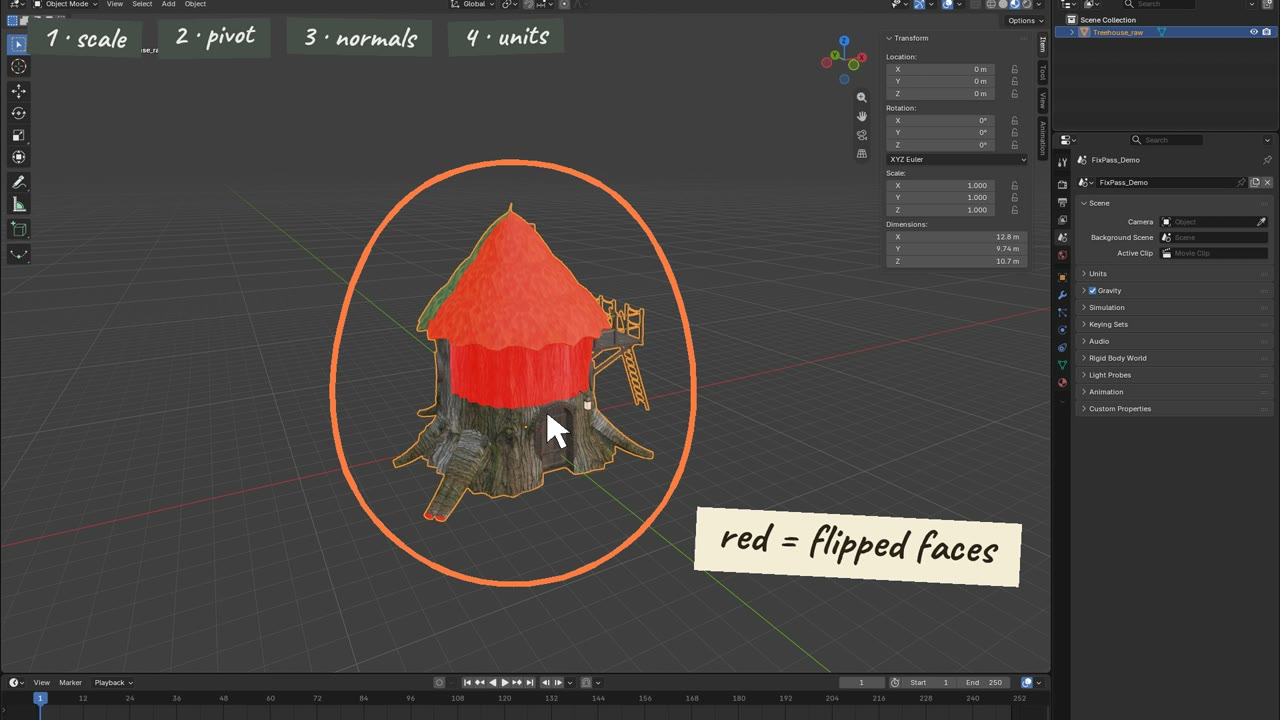
3D-Agent did all four, so that's another point. 3D-Agent 2, me 0.
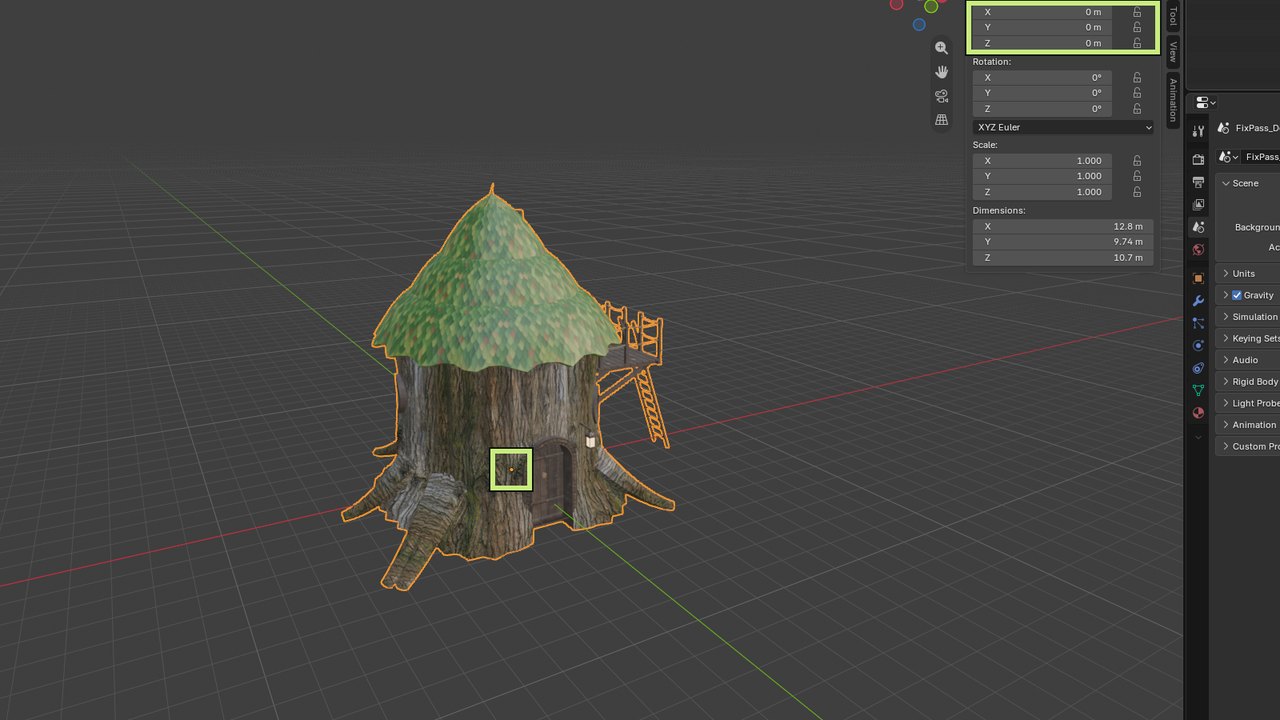
Prompt · The four fixes (template)
Make SM_MyAsset game-ready and report what you changed:
1. Apply rotation and scale, so the scale reads 1.00.
2. Put the origin at the bottom center of the model, on the ground (Z = 0).
3. Check the normals. Recalculate outside and fix any flipped faces.
4. Use metric units with 1 unit = 1 m, and report the final dimensions in meters.
Step 3: Turn the recipe into a factory
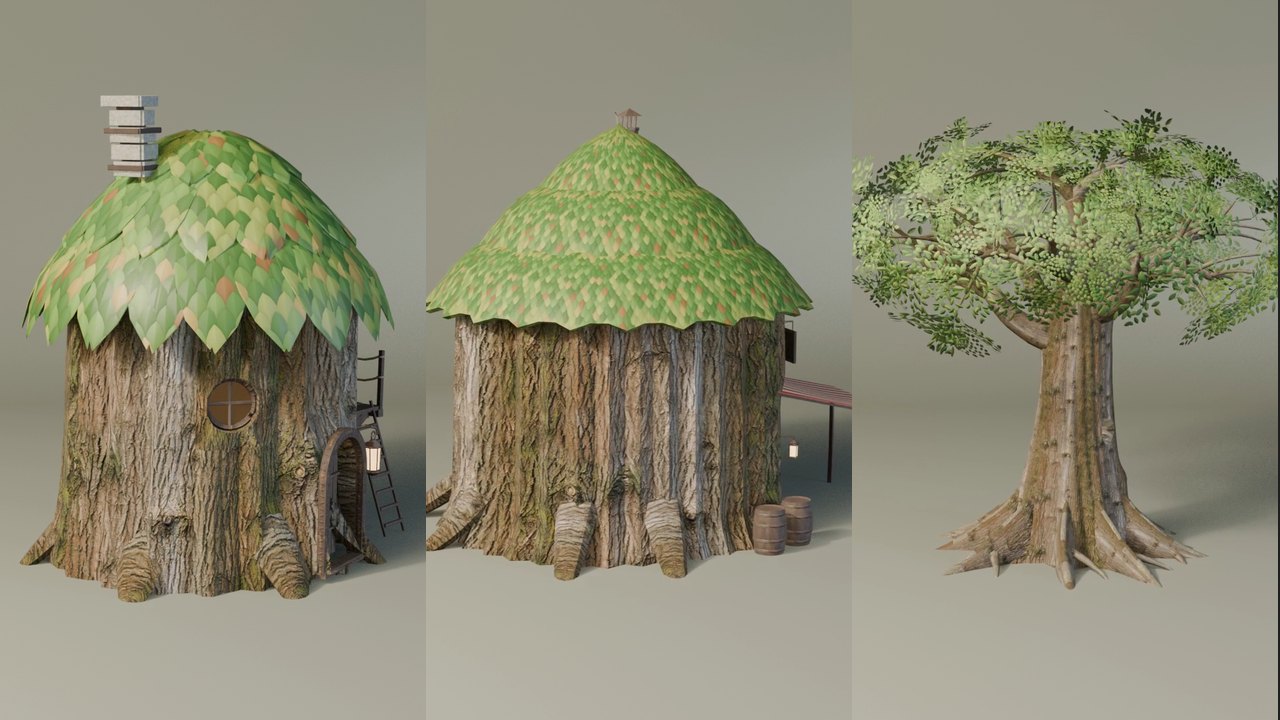
Once the recipe was working, it became a factory: fences, the shop, the bridge, rocks and signs. The standards stay the same in every prompt. Only the model changes. That's how you get to 81 assets with 27 prompts in one day.
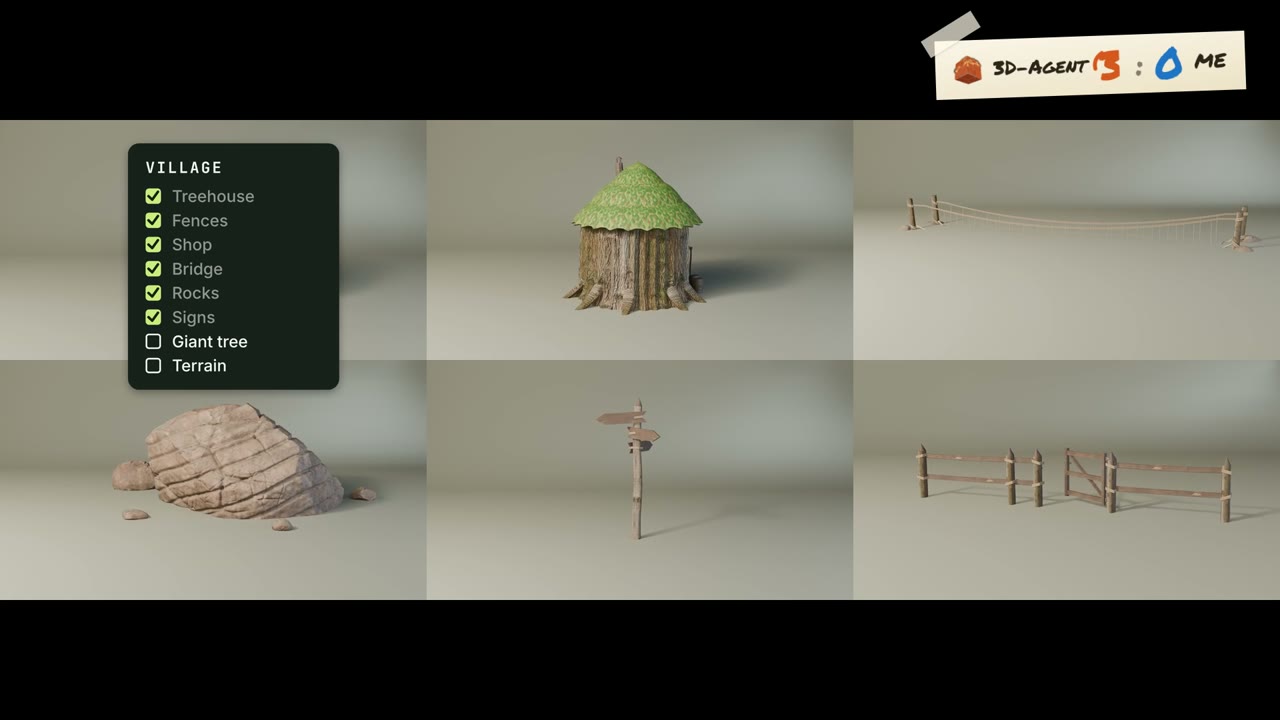
3D-Agent 3, me 0.
Then I got too confident. I was like, okay, give me the hardest part of the village: the giant tree. I was sure this one would fail. It took just one prompt.
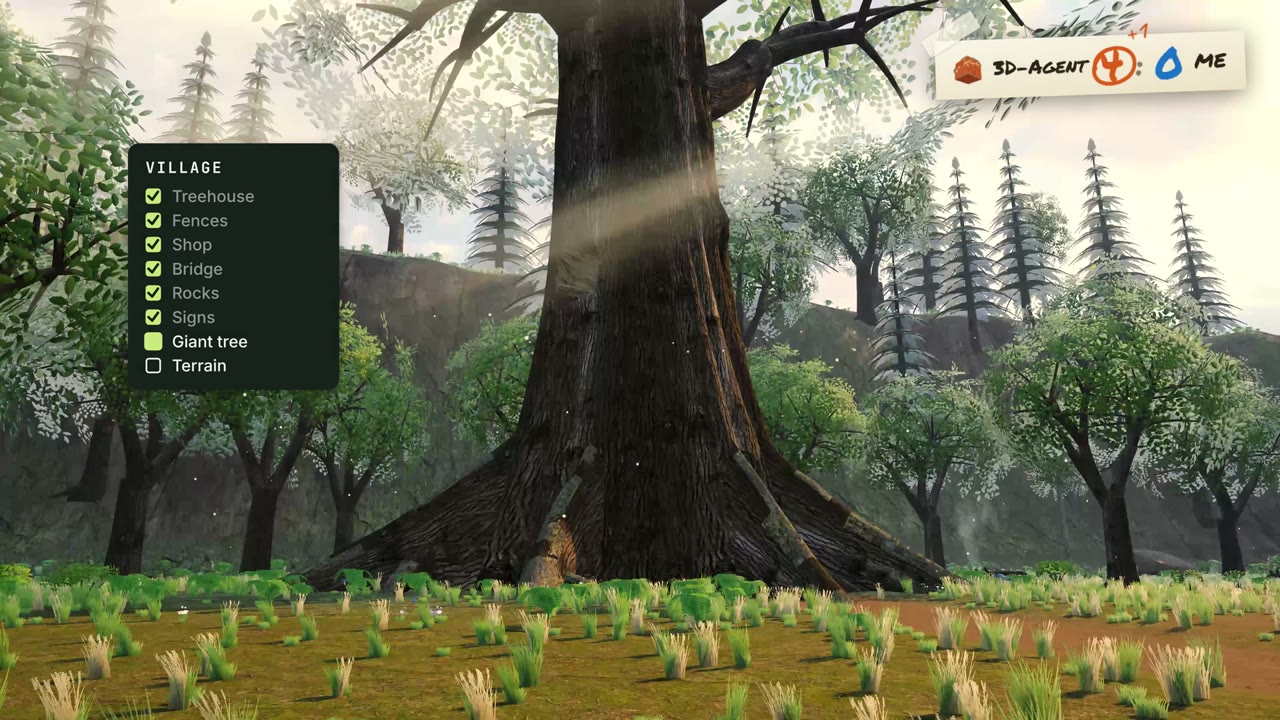
3D-Agent 4, me 0.
Prompt · Next asset, same recipe (template)
Model SM_Fence_A: a crooked wooden fence section. Size: 2 m long, 1 m tall. The details, with sizes. Budget: 800–1,500 triangles. Reuse the existing materials in this file.
Use the same style and the same standards as the last model.
The factory prompts
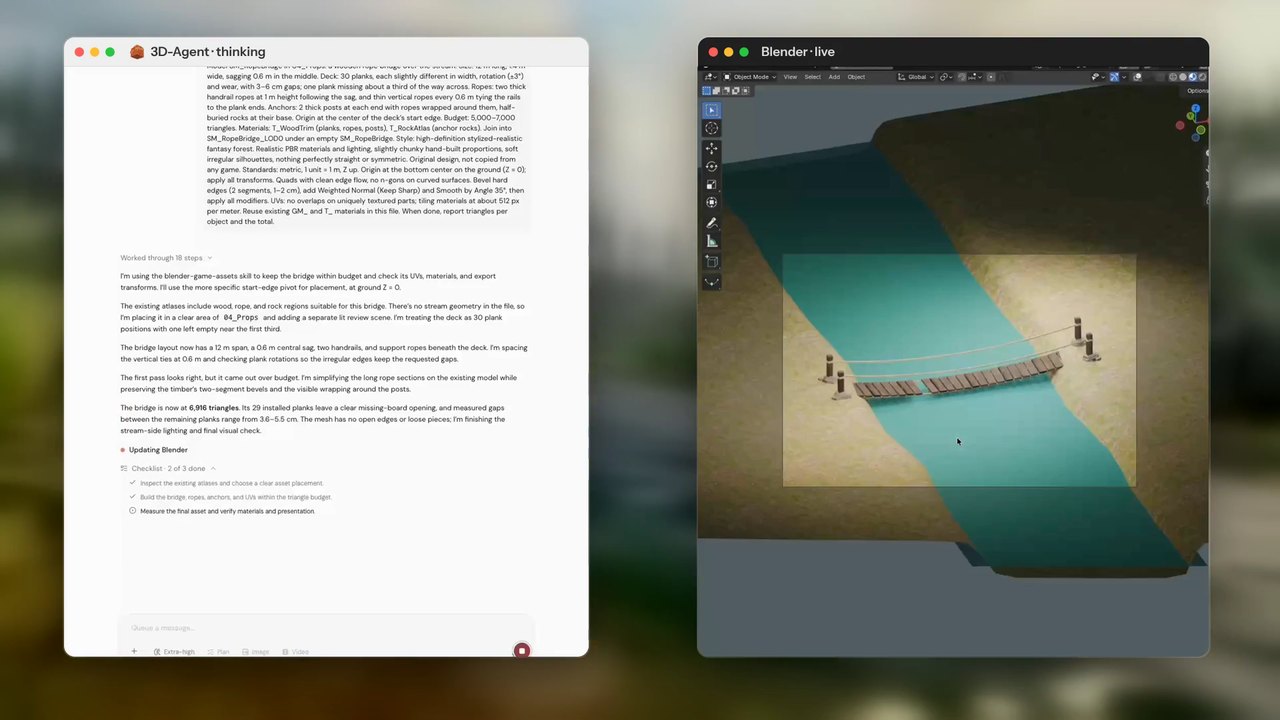
This is another real prompt from the project: the rope bridge. Look at the details that stop it from looking generated: every plank is a little different, and one is missing.
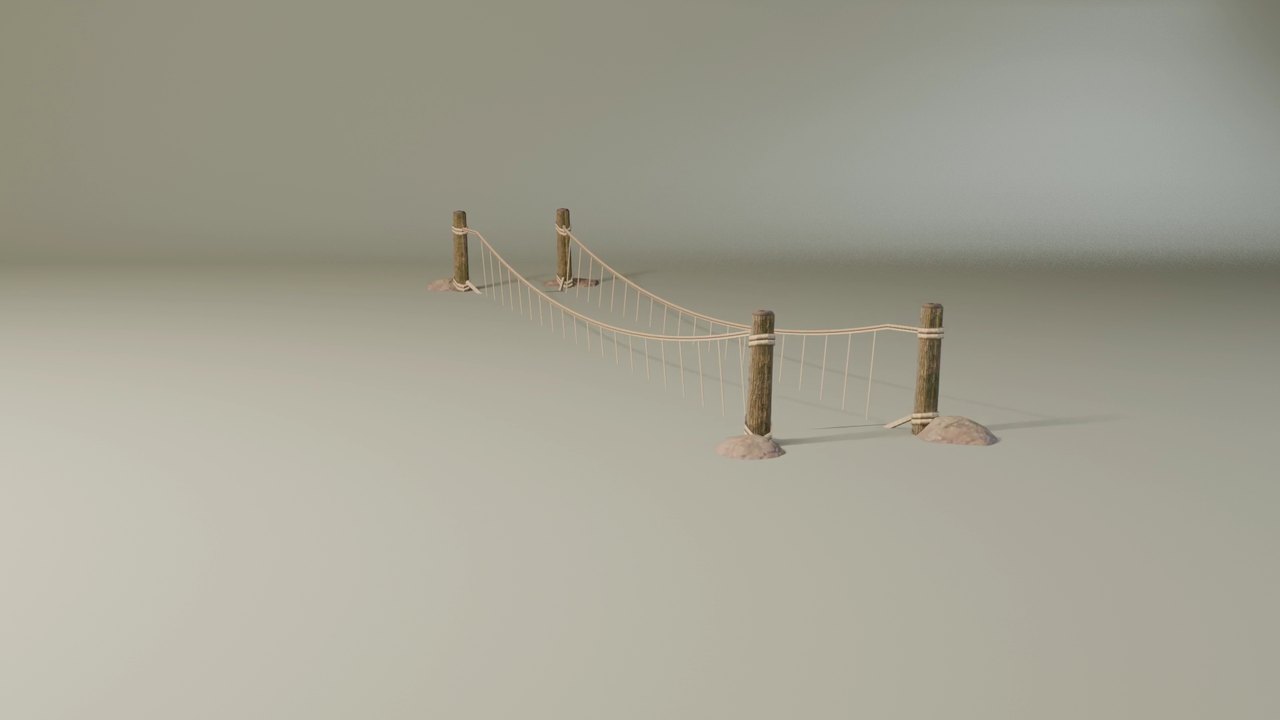
Prompt · Rope bridge · the real prompt from the video
Model SM_RopeBridge in 04_Props: a wooden rope bridge over the stream. Size: 12 m long, 1.4 m wide, sagging 0.6 m in the middle. Deck: 30 planks, each slightly different in width, rotation (±3°) and wear, with 3–6 cm gaps; one plank missing about a third of the way across. Ropes: two thick handrail ropes at 1 m height following the sag, and thin vertical ropes every 0.6 m tying the rails to the plank ends. Anchors: 2 thick posts at each end with ropes wrapped around them, half-buried rocks at their base. Origin at the center of the deck's start edge. Budget: 5,000–7,000 triangles. Materials: T_WoodTrim (planks, ropes, posts), T_RockAtlas (anchor rocks). Join into SM_RopeBridge_LOD0 under an empty SM_RopeBridge. Style: high-definition stylized-realistic fantasy forest. Realistic PBR materials and lighting, slightly chunky hand-built proportions, soft irregular silhouettes, nothing perfectly straight or symmetric. Original design, not copied from any game. Standards: metric, 1 unit = 1 m, Z up. Origin at the bottom center on the ground (Z = 0); apply all transforms. Quads with clean edge flow, no n-gons on curved surfaces. Bevel hard edges (2 segments, 1–2 cm), add Weighted Normal (Keep Sharp) and Smooth by Angle 35°, then apply all modifiers. UVs: no overlaps on uniquely textured parts; tiling materials at about 512 px per meter. Reuse existing GM_ and T_ materials in this file. When done, report triangles per object and the total.
These are templates I wrote for this post, with the same recipe. Paste the reusable block at the end of each one.
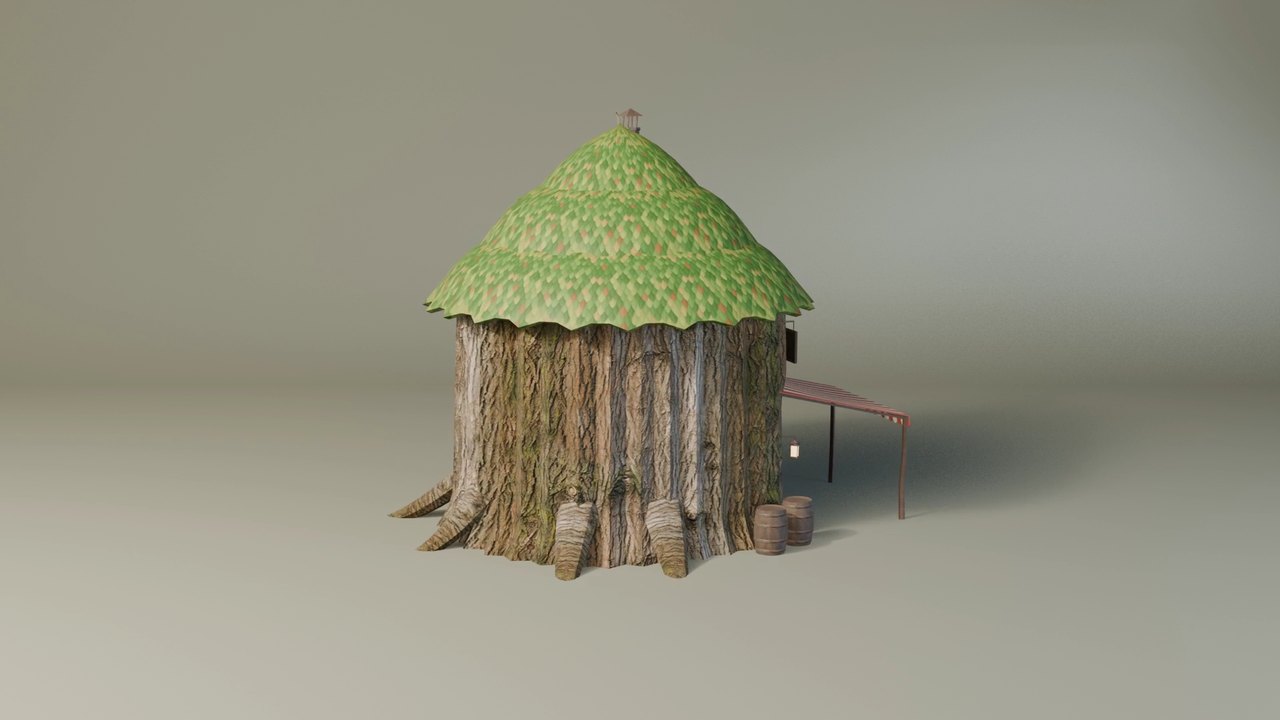
Prompt · Building (template)
Model SM_Shop in 02_Buildings: a small village shop with a striped cloth awning. Size: 6 m wide, 5 m deep, 5 m tall. Body: thick wooden walls, slightly crooked, on a low stone base. Front: a wide counter opening, a plank door 1 × 2 m, and barrels beside it. Roof: thatch, drooping 0.4 m over the edge. Budget: 8,000–12,000 triangles.
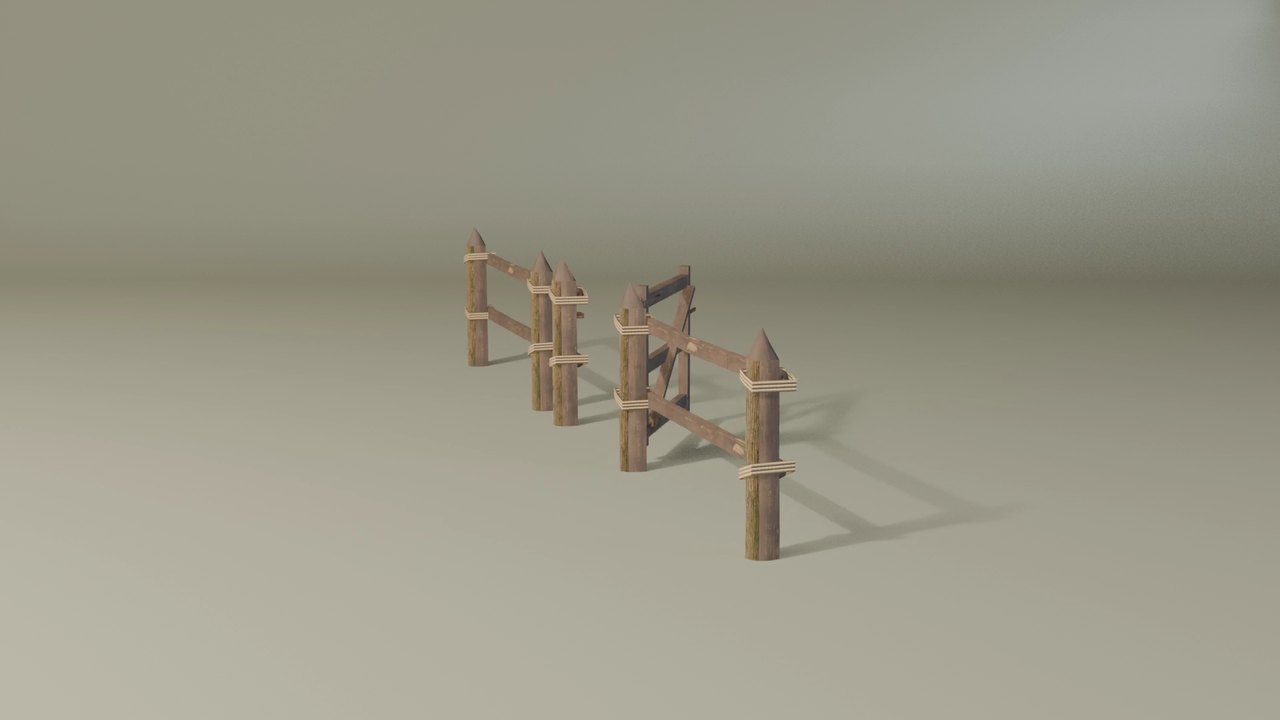
Prompt · Fence set (template)
Model SM_Fence in 04_Props: a crooked wooden fence. Make 3 variations: a straight section 2 m long, a corner, and a gate. Posts: 1.1 m tall, each one slightly different in angle and thickness. Rails: 2 rough rails per section. The sections must connect end to end. Budget: 800–1,500 triangles each. Put the origin of each section at the start of its bottom edge.
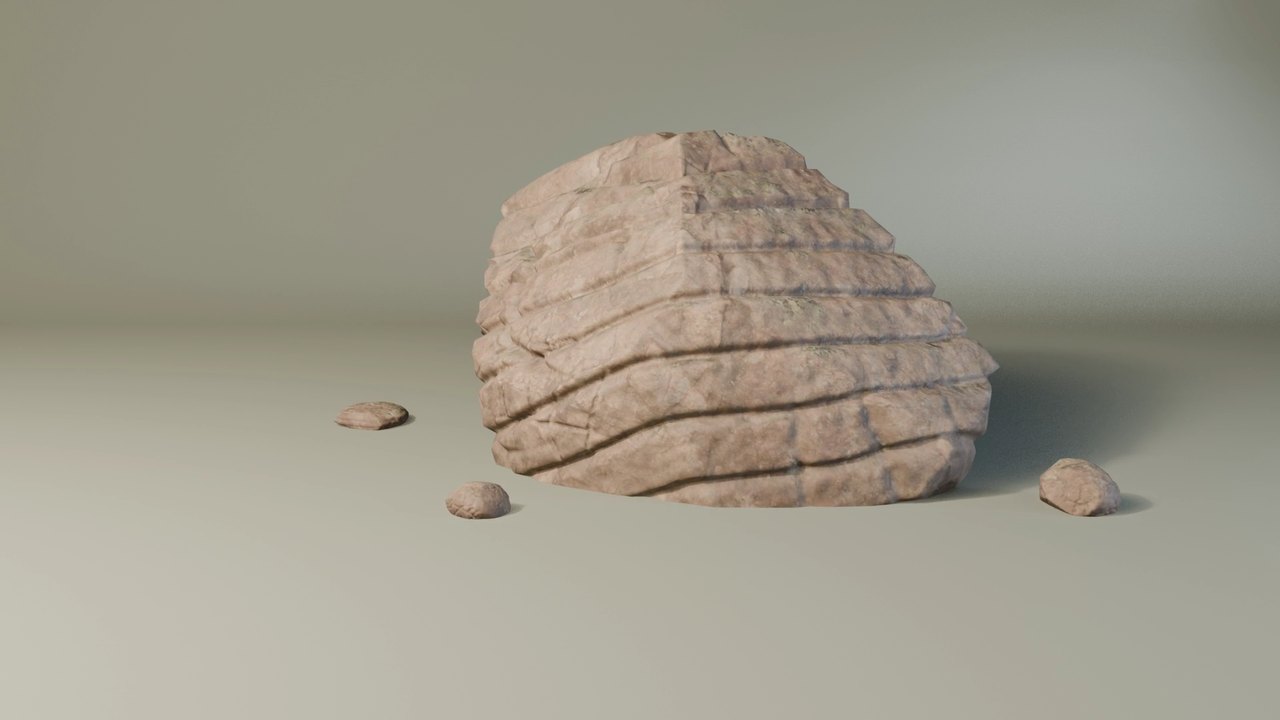
Prompt · Rocks (template)
Model SM_Rock in 04_Props: a set of 5 rocks, from 0.3 m to 3 m wide. Shape: rounded and layered, with cracks modeled into the silhouette. Each rock must have a different silhouette. The bottom of each rock sinks 10 cm below Z = 0, so it sits in the ground. Budget: 300–2,000 triangles each, by size.
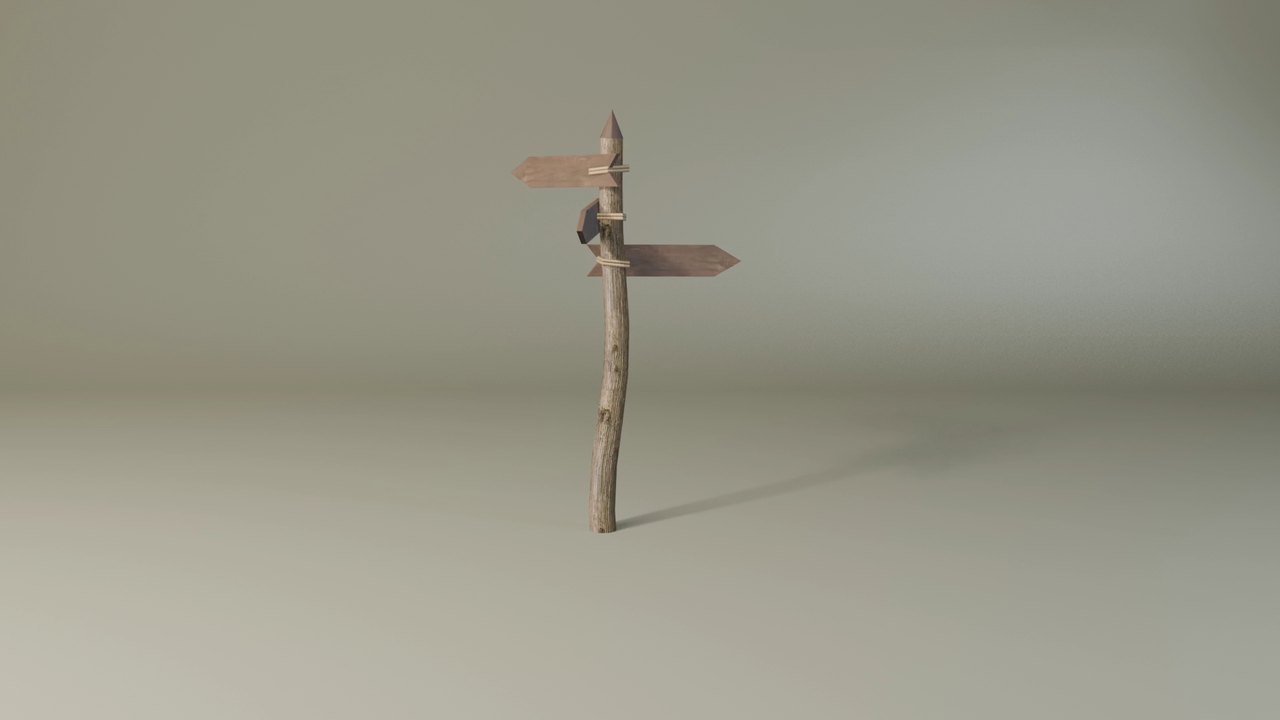
Prompt · Sign (template)
Model SM_Signpost in 04_Props: a leaning wooden post with 2 arrow signs pointing different ways. Size: 2.4 m tall. Details: rough cut edges, iron nails, and no text on the signs. Budget: 600–1,000 triangles.
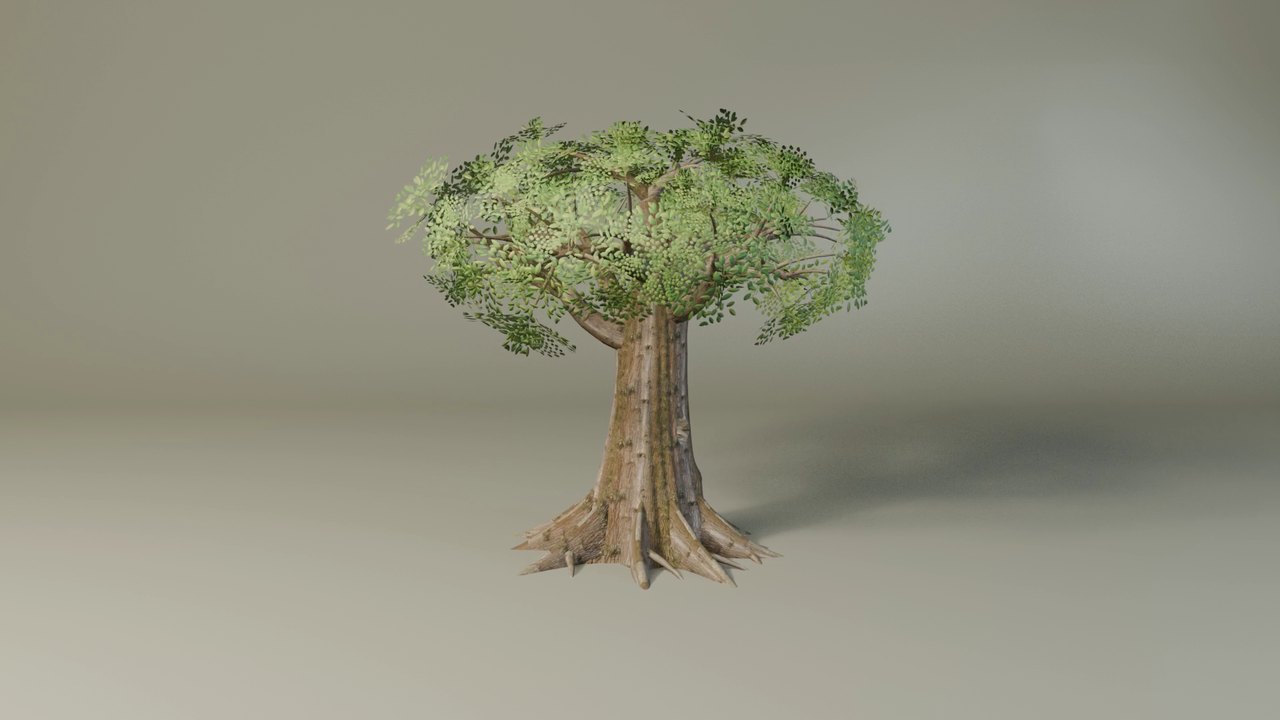
Prompt · Giant tree (template)
Model SM_GiantTree in 03_Nature: the oldest tree in the village, the landmark you see from everywhere. Size: 25 m tall, a trunk 6 m wide at the base. Trunk: deep bark furrows modeled into the silhouette, with big roots spreading out and sinking below Z = 0. Branches: thick and twisted, built from a few large shapes. Leaves: clusters on separate cards, so they can move in the wind. Budget: 25,000–40,000 triangles.
Step 4: Fix the import into Unity
Remember when I said it almost broke? Well, this is it. We got to day two.
Look what happens if you bring your models into Unity the wrong way. Everything is pink, which means no material. And the house is a hundred times too big.
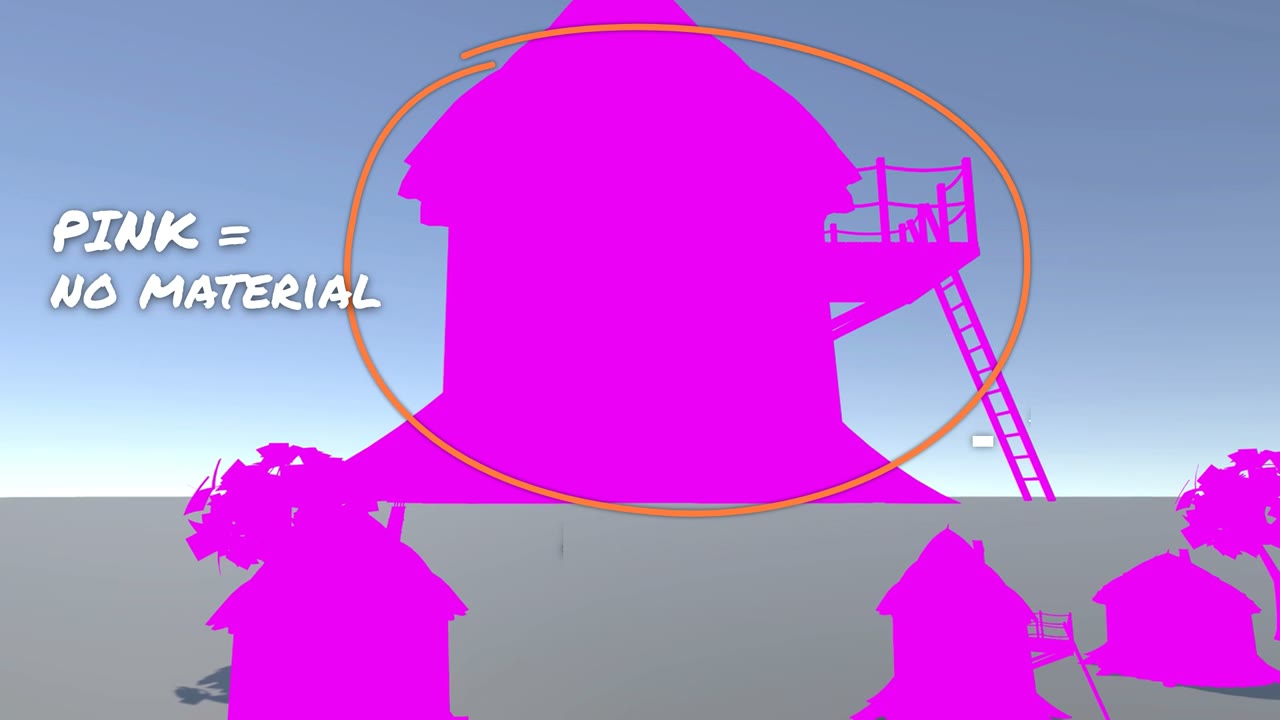
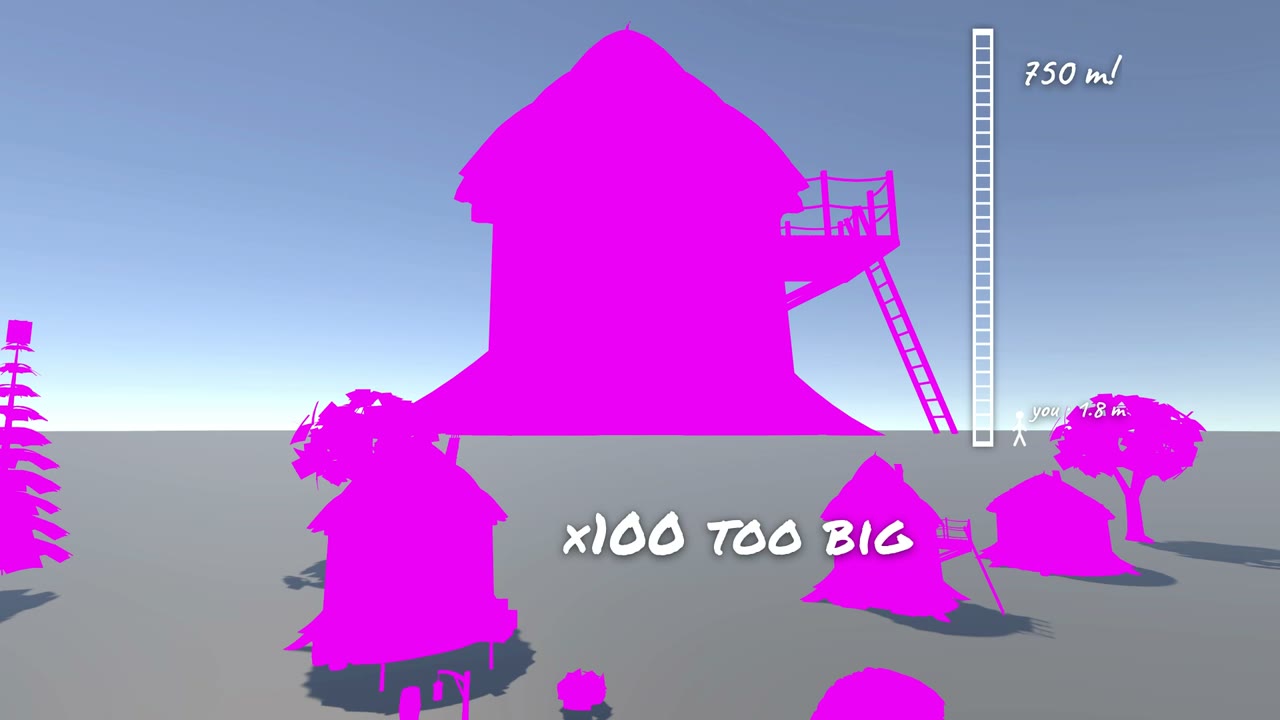
I almost gave up. Then came the fix. If you save one part of this post, save this one. It takes two minutes:
In Blender:
- Apply rotation and scale.
- Export as FBX.
- Turn Apply Transform on.
- Set Forward to -Z and Up to Y.
In Unity:
- Run the Render Pipeline Converter and convert the materials.
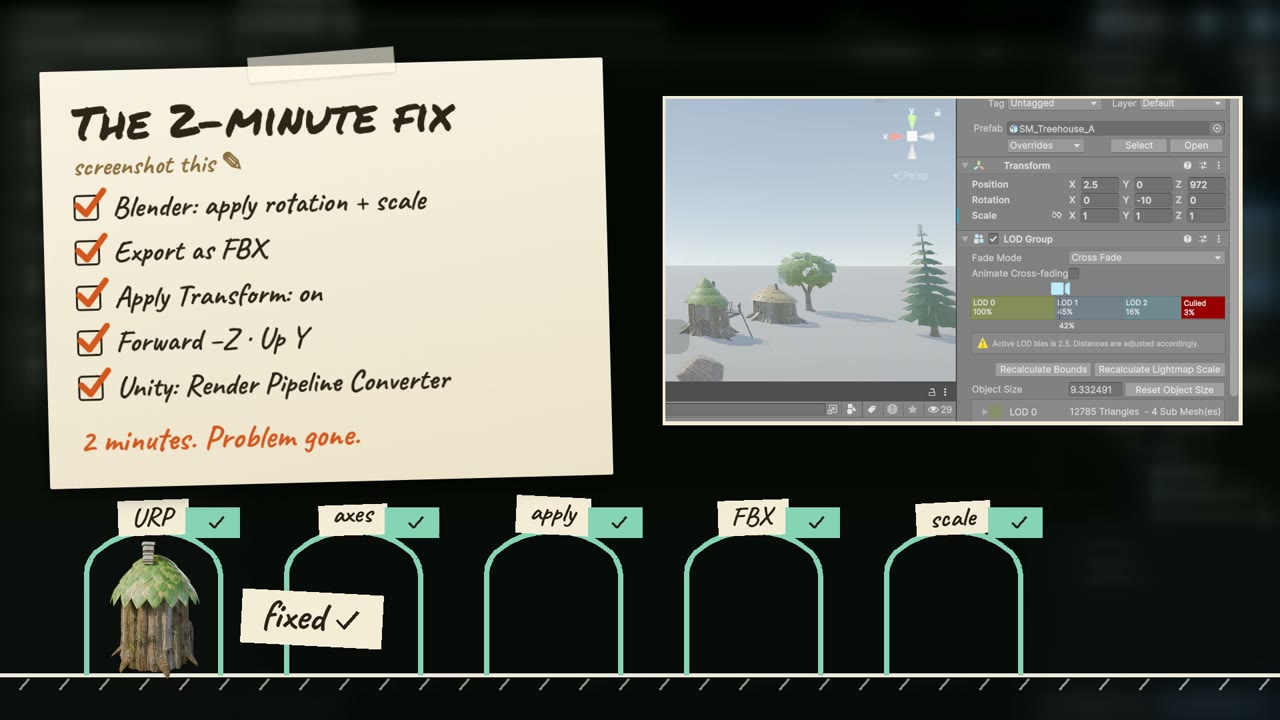
Import it again, and now everything is in the right place.
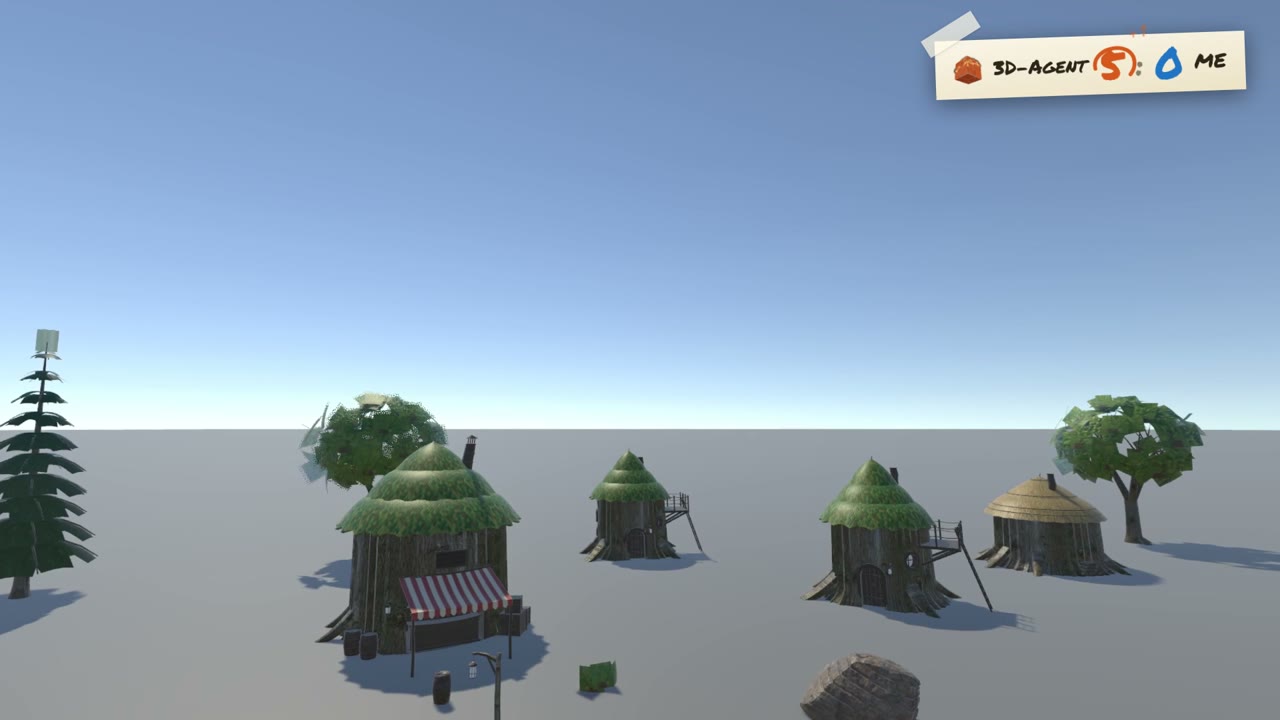
3D-Agent 5, me 0.
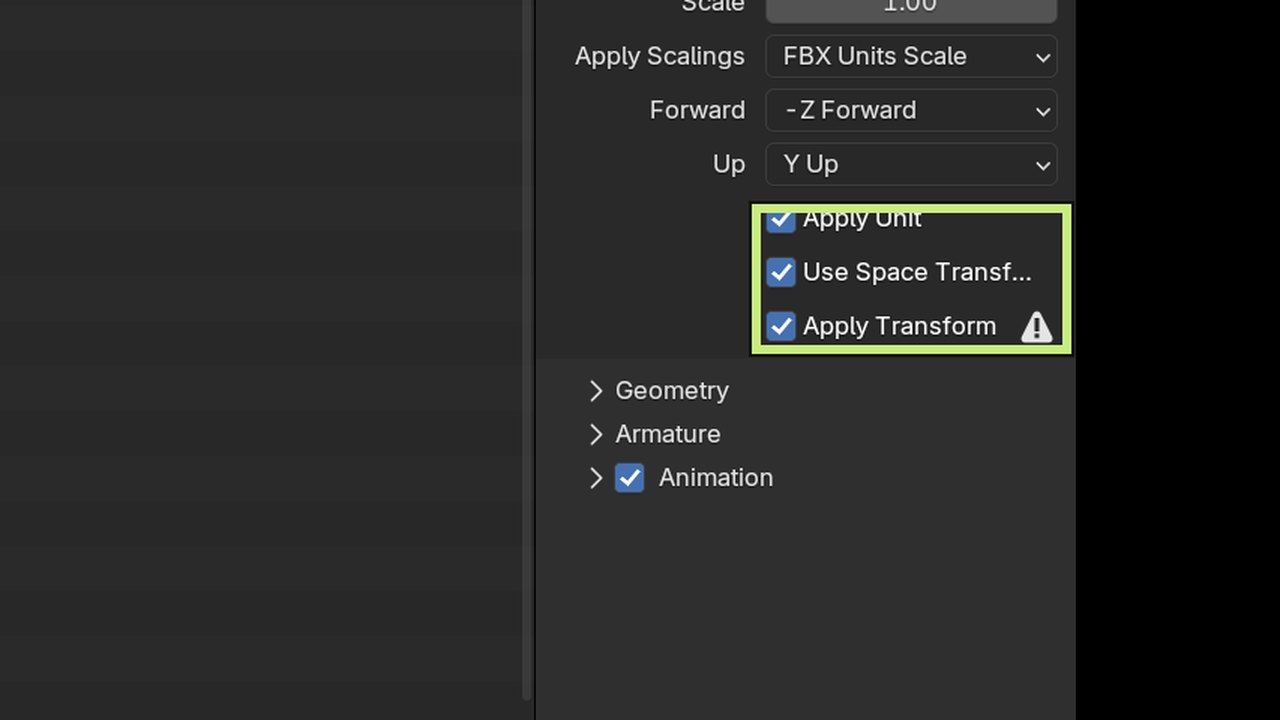
Prompt · Prepare the FBX for Unity (template)
Export SM_MyAsset as FBX for Unity. Apply rotation and scale first. Use these settings: Apply Transform on, Forward -Z, Up Y, FBX Units Scale. Save it as SM_MyAsset.fbx and report the dimensions in meters.
When you have many models, do them all at once:
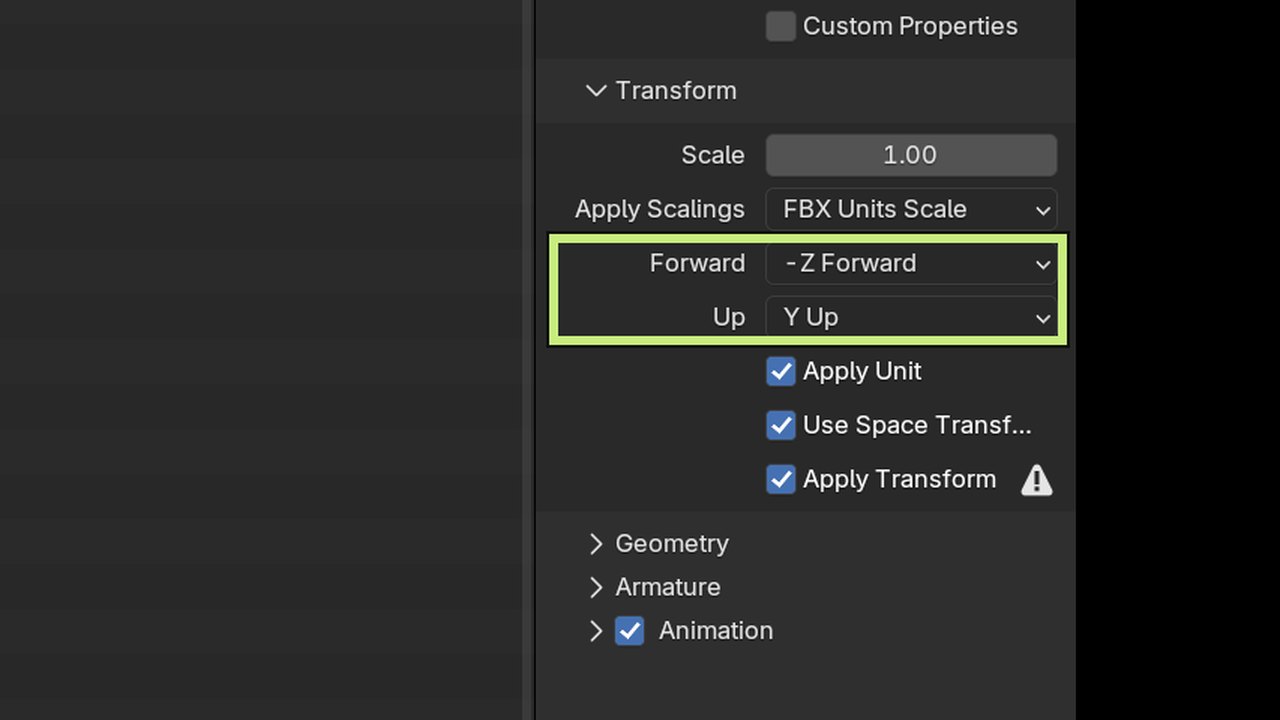
Prompt · Export everything (template)
Export every model in 02_Buildings, 03_Nature and 04_Props as its own FBX in the Unity Assets/Models folder. Before each export, apply rotation and scale, and check that the origin is where the model needs it. Use the same settings for every file: Apply Transform on, Forward -Z, Up Y, FBX Units Scale. Then list each file with its dimensions in meters and its triangle count, and flag anything that looks the wrong size.
Check that list before you import. A house 750 meters tall is easy to spot in a table.
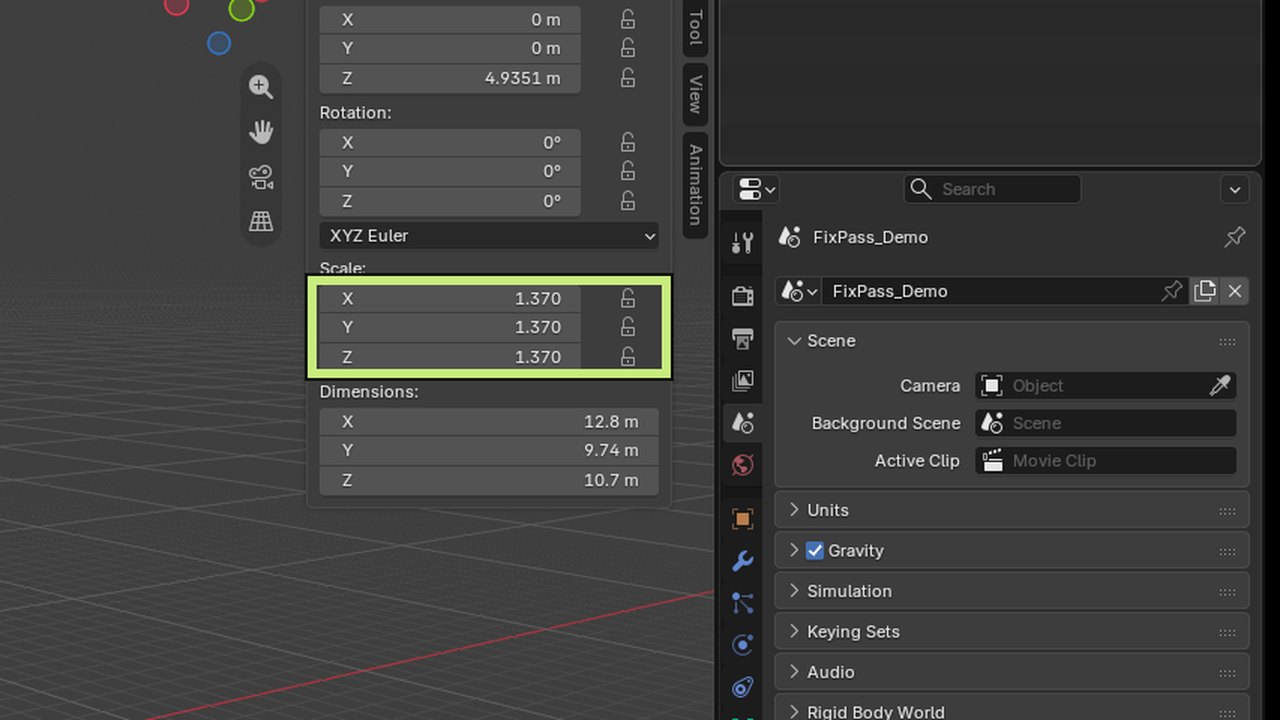
Prompt · Check before import (template)
Check every model in this file before I export it. List any model with a scale other than 1.00, a rotation that isn't applied, flipped normals, overlapping UVs, or more material slots than 4. Don't change anything yet. Show me the list first.
Step 5: Build the village and light it
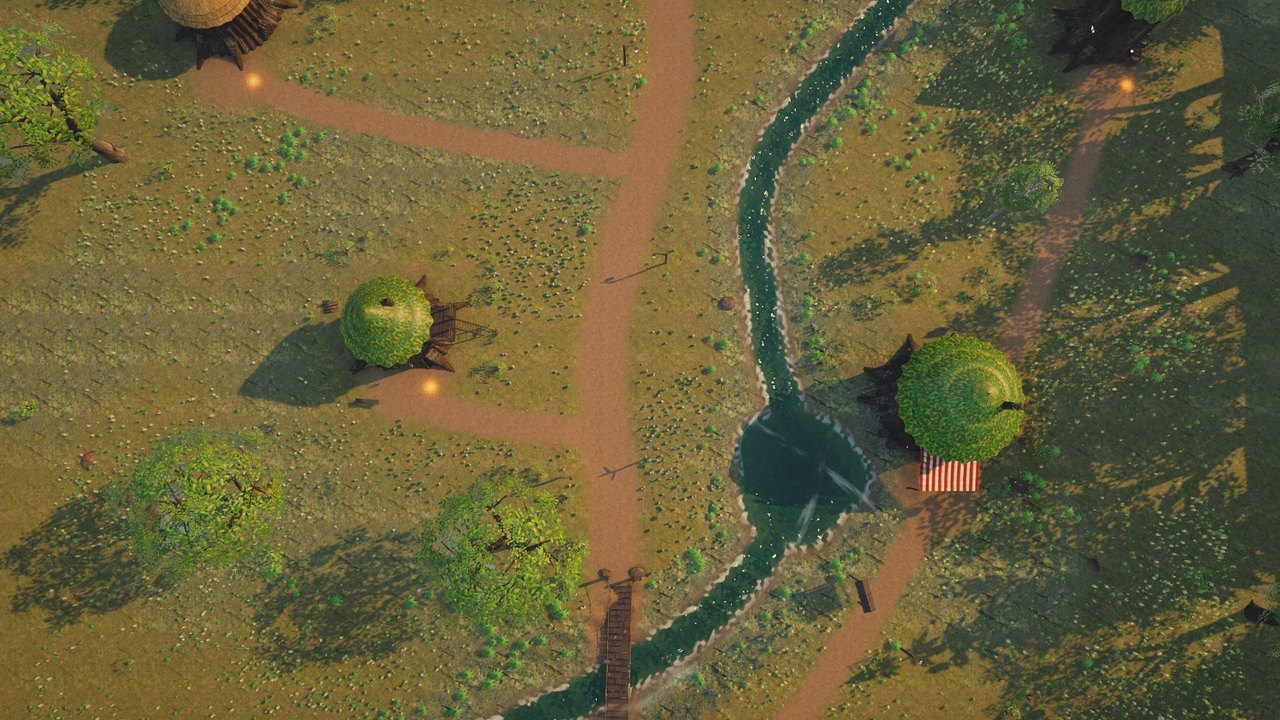
Now comes the fun part. The terrain, the grass, the trees, and every asset in its place.
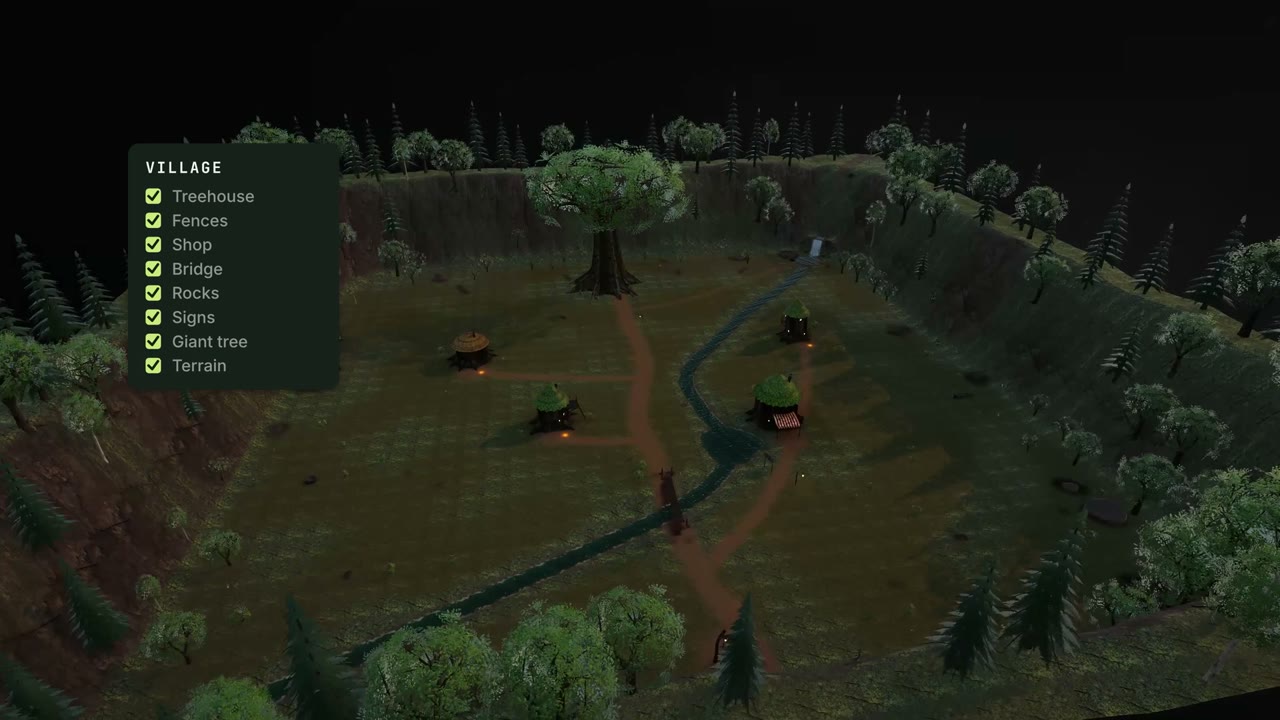
This is where it stops looking like a tech demo. Start with the default light, then add one layer at a time:
- The sun
- The sky
- The fog
- The light rays
- The color grade
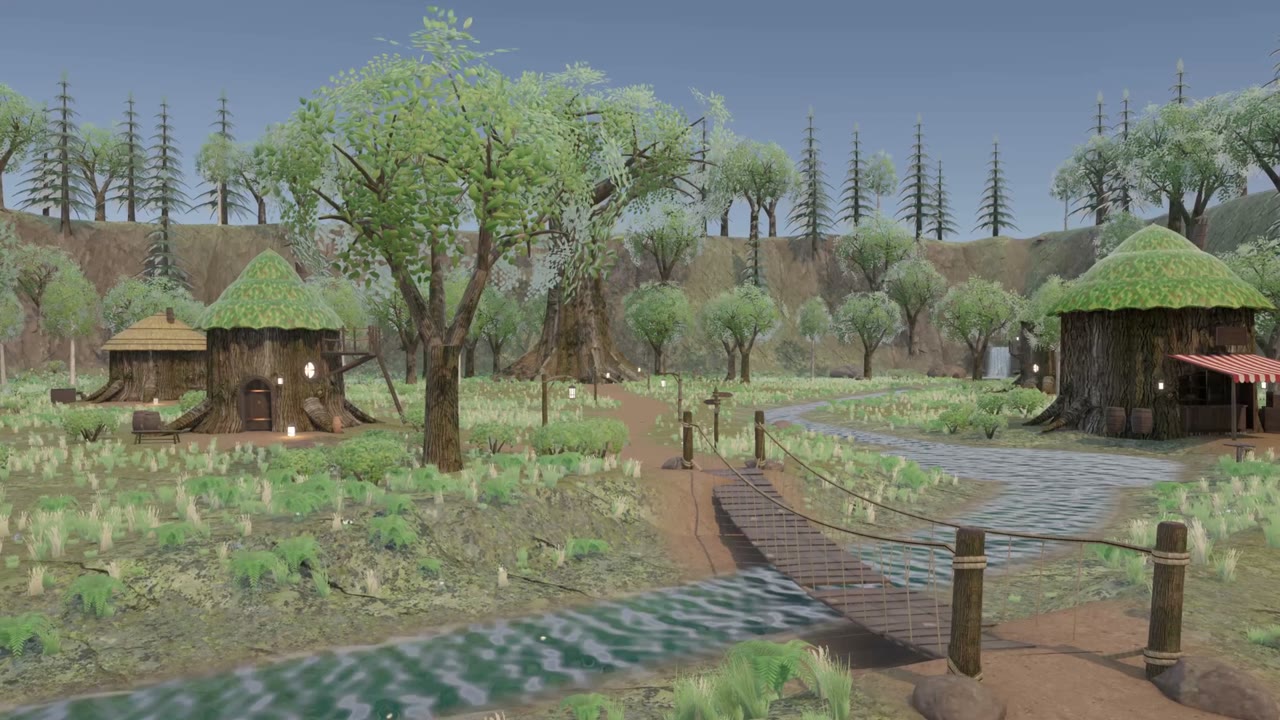
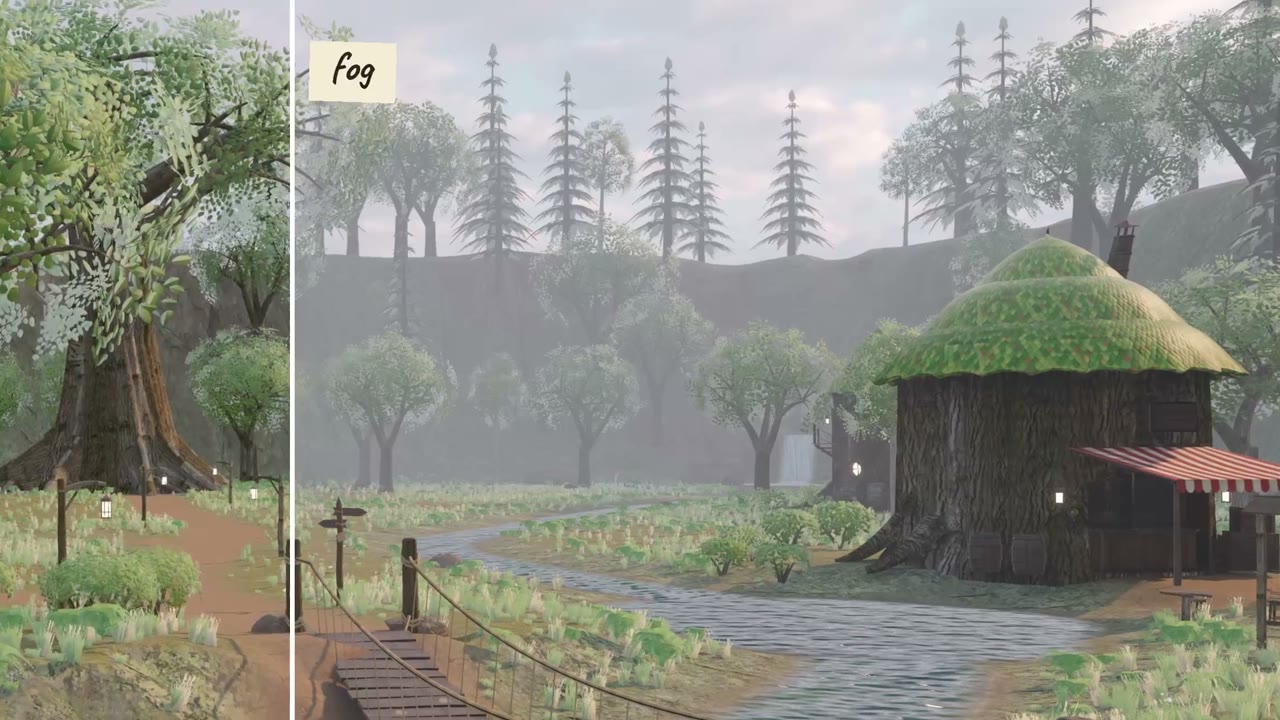
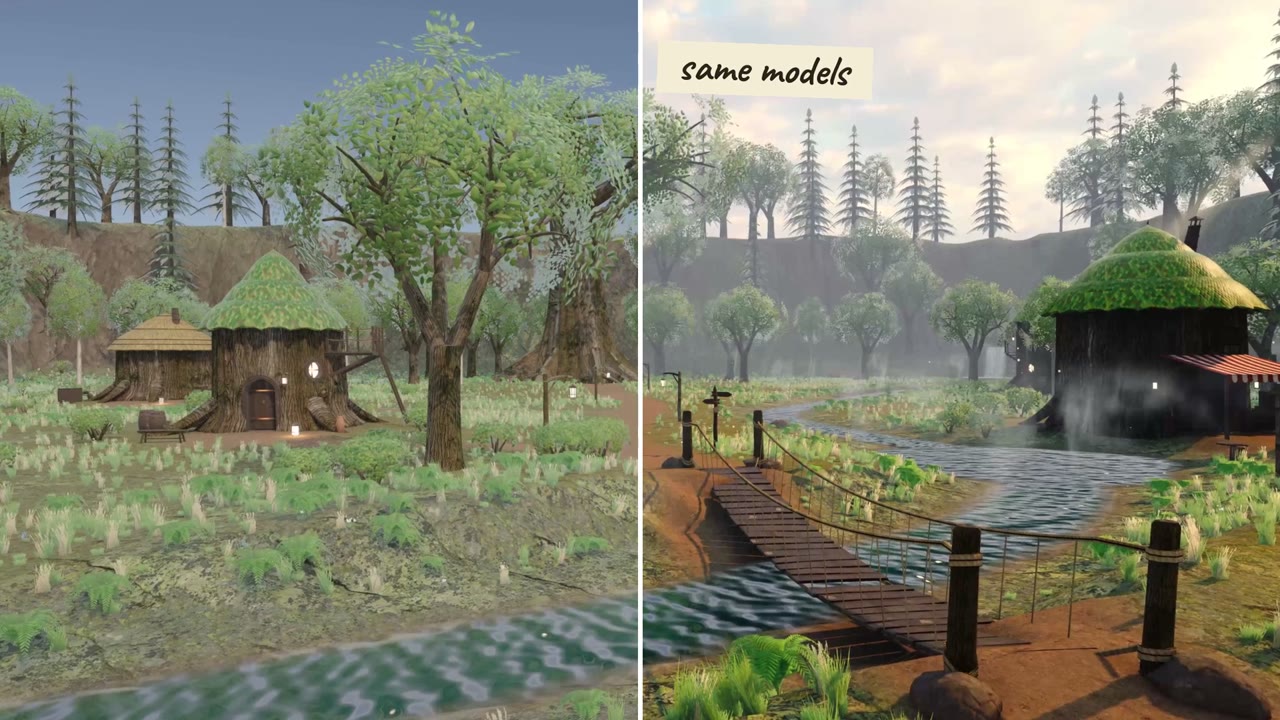
It's the same models, but it's a totally different place. Add the layers one by one, so you can see what each one does.
Before you move to Unity, you can also test the layout in Blender. This one is optional, and it's a template:
Prompt · Test the village layout in Blender (template)
Make a layout test of the village in a new collection, using simple copies of the existing models. The area is 120 × 120 m. Put the giant tree in the back center as the landmark, a dirt path from the front to the tree, a stream crossing the path, with the rope bridge over it, and the treehouse and shop near the path. Fill the rest with trees, rocks and fences, in natural groups, not in a grid. Don't change the original models. Render a view from above and a view from eye level.
Step 6: Add colliders and walk
A remake is not just a picture. You need to get in there and walk around.
So I added a character and put a camera behind it. I pressed Play, and he just fell into the ground.
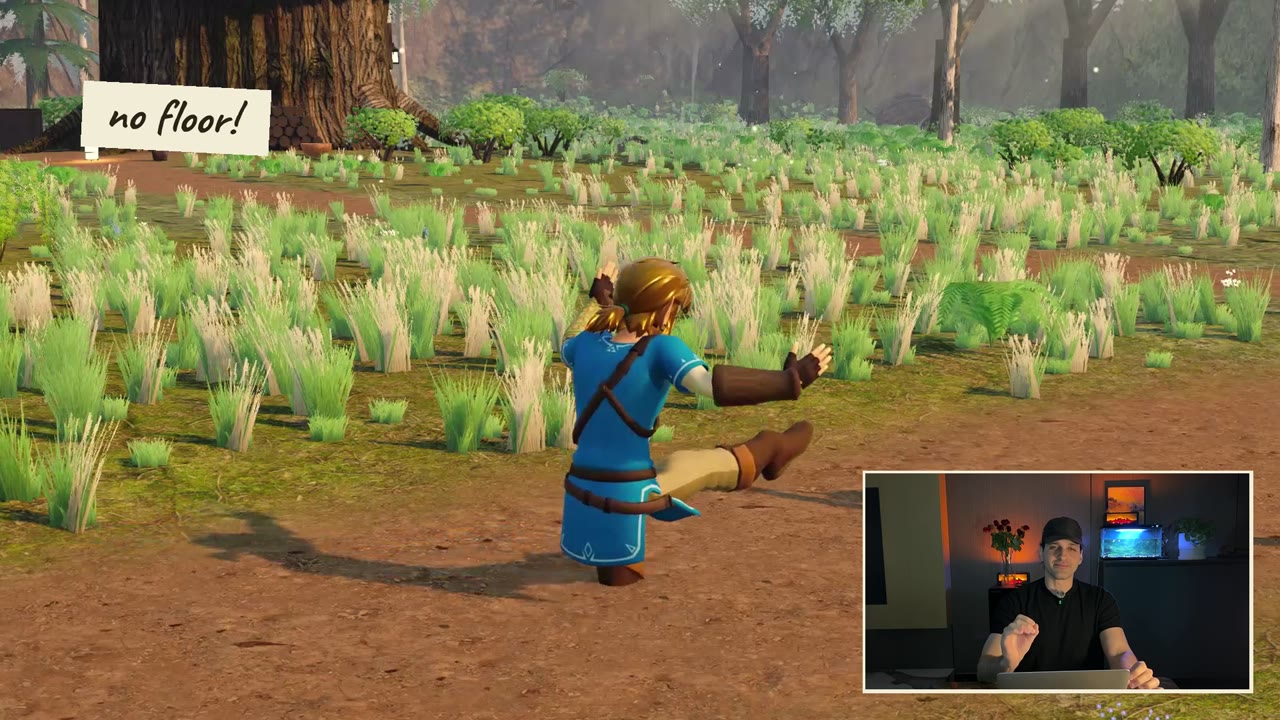
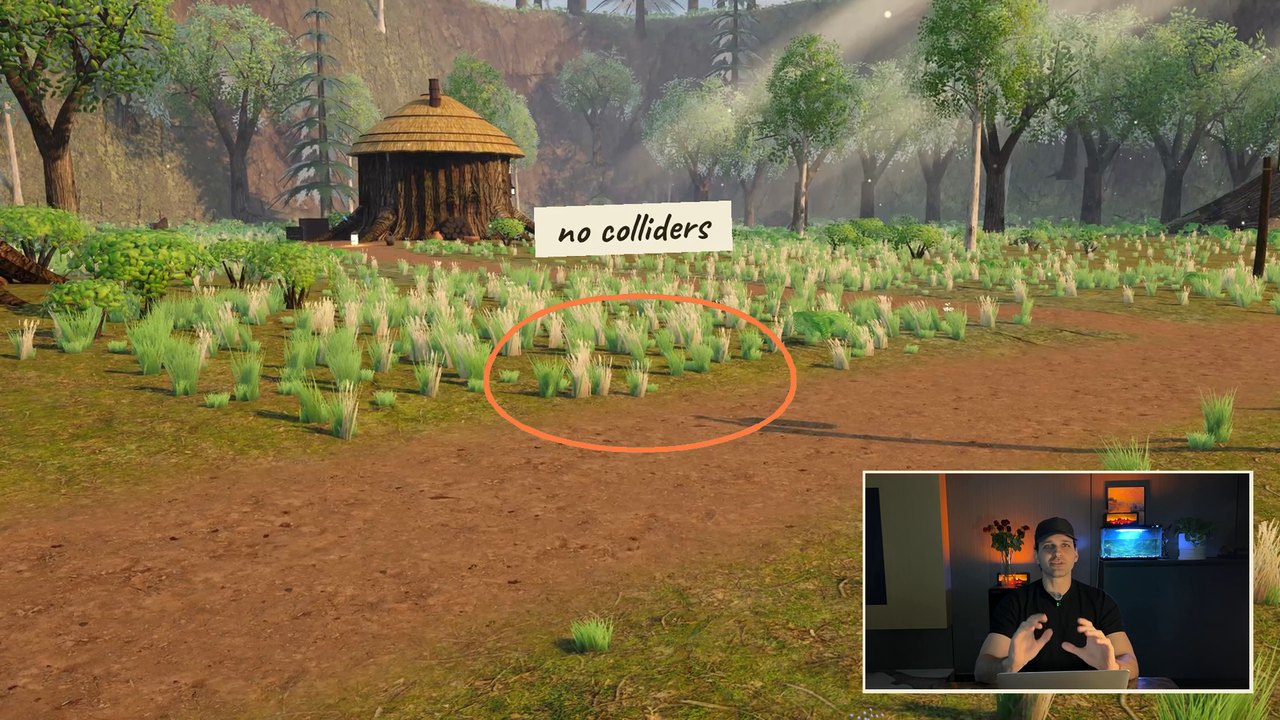
The model is there, so your eyes see a floor. The physics doesn't. It needs colliders, the invisible shapes that tell the game where things are solid. Okay, I got it: we need to add colliders to the scene, and try again.
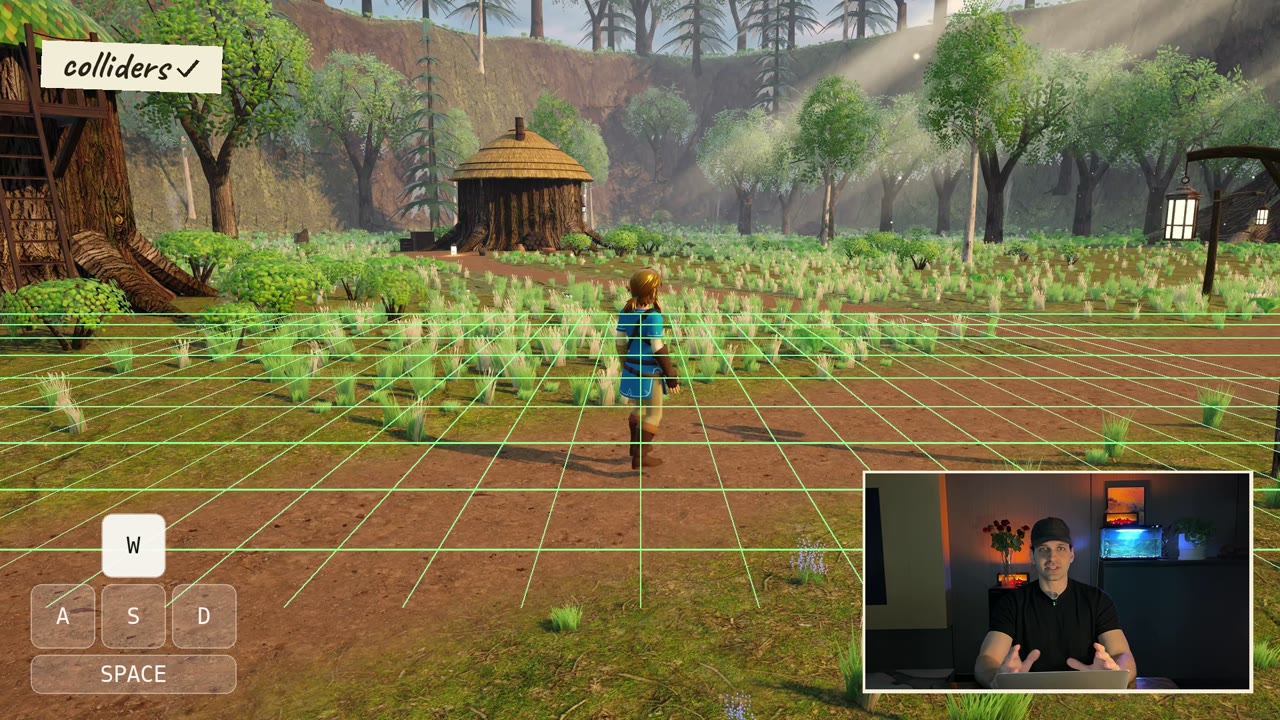
Finally, a point for me. 3D-Agent 5, me 1.
Big models with detail make slow colliders. A simple shape around them works better, and 3D-Agent can make it in Blender. This one is a template too:
Prompt · Simple collider shapes (template)
Make a simple collision mesh for SM_Treehouse_A. Use a few convex shapes that follow the outside of the trunk, the roots and the balcony, with under 300 triangles in total. Leave the leaf roof and small details out. Name it SM_Treehouse_A_Collider and keep it in the same place as the model, without any material, so I can use it as a Mesh Collider in Unity.
The tools I used
- 3D-Agent, an AI tool for Blender and my own product. It built the models from plain English.
- Blender, the free 3D software where the models live and get fixed.
- Unity, where it all becomes a place you can walk around.
If you're new to the idea of an agent driving Blender, start with the Blender AI guide.
That's the whole workflow: write the prompt as a spec, make every model game-ready, turn the recipe into a factory, fix the import, light it one layer at a time, and add colliders before you press Play. My final score was 5 to 1. 3D-Agent made 95% of what you saw. And me? I just typed the prompts and pressed Enter.
Build your first game asset with 3D-Agent
Write the prompt as a spec, and 3D-Agent builds the model in your own Blender. And tell me in the comments: which place should I rebuild next?
Questions
Can AI build a 3D game world?
AI can build the models, but it still takes a full workflow to make a place you can walk around. In this project, 3D-Agent made 81 assets from 27 prompts in one day, and the whole village took 3 days. It was one village, not a full game.
Why are my models pink in Unity?
Pink means Unity has no working material for the model. In this project, running the Render Pipeline Converter and converting the materials fixed it.
Why is my Blender model too big in Unity?
It usually comes from the scale and export settings. Apply rotation and scale in Blender, then export as FBX with Apply Transform on, Forward set to -Z and Up set to Y. My house came in 100 times too big until I did this.
Why does my character fall through the ground in Unity?
The scene has no colliders. You can see the ground, but the physics can't. Add colliders to the ground and try again.
How do you write a good prompt for a 3D model?
Write it as a spec, not a wish. Give it a style, real sizes in meters and a polygon budget, then list the parts of the model.
Did you use the original game's files?
No. These are new models made from my own prompts, and each prompt asks for an original design. It's a fan project made for learning, and it isn't affiliated with or endorsed by Nintendo.

Comments
Questions, results, or the story you'd film next.